Full-Stack Developer
incomplete
AWS Learning Path
Introduction
What is a Full-Stack Developer?
You want to learn about both client and server-side code and understand how the full suite of technologies making up a website work. On the client side, you want to build everything you actually see on a website (e.g., the layout, the positioning of text and images, colors, fonts, buttons, etc.) using, typically, HTML, CSS, and JavaScript. On the server side, you want to create algorithms and business logic to manipulate data that is received from the client side.
What Will I Learn?
Deploy a web app to AWS
Create and host a web app that renders "Hello World" and set it up so users can easily access it.
Build a serverless backend
Create a serverless function to trigger based on custom inputs in a text field.
Store data in a database
Store data from the custom input field and render that text on your website.
Build a Basic Web Application
Overview
In this tutorial, you will create a simple web application. You will first build a static web app that renders "Hello World." Then you will learn how to add functionality to the web app so the text that displays is based on a custom input you provide.
What you will accomplish
This tutorial will walk you through the steps to create the sample web application discussed above. You will:
Create a web app
Connect the web app to a serverless backend
Add interactivity to your web app with an API and a database
Application Architecture
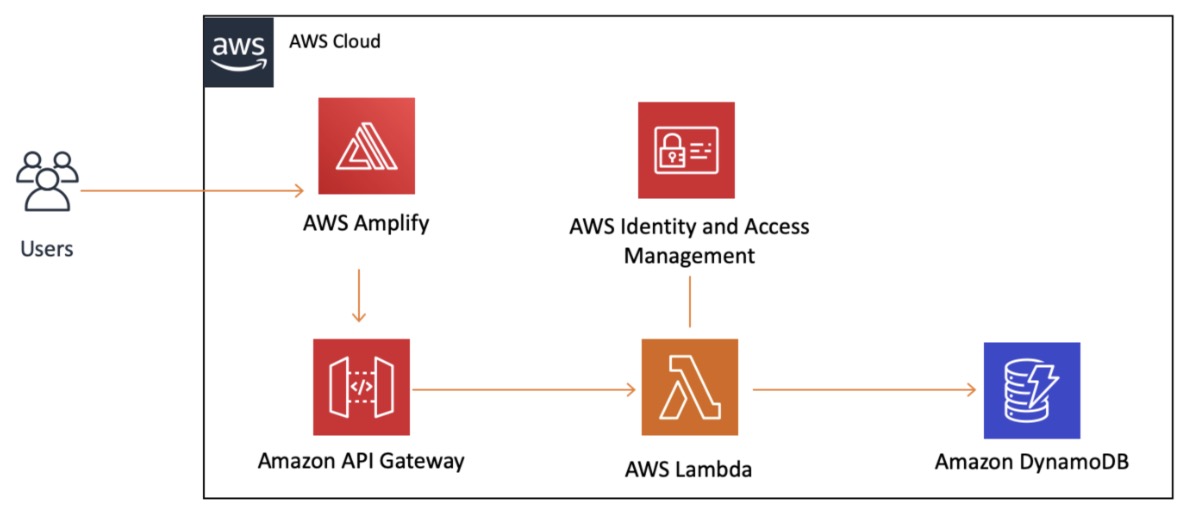
The diagram below provides a visual representation of the services used in this tutorial and how they are connected. This application uses AWS Amplify, Amazon API Gateway, AWS Lambda, Amazon DynamoDB, and AWS Identity and Access Management (IAM).
As we go through the tutorial, we will discuss the services in detail and point to resources that will help you get up to speed with them.
Module 1: Create Web App
Overview
In this module, you will use the AWS Amplify console to deploy the static resources for your web application. In subsequent modules, you will add dynamic functionality to these pages using AWS Lambda and Amazon API Gateway to call remote RESTful APIs. (REST, which stands for Representational State Transfer, is an architectural pattern for creating web services. API stands for application programming interface. Thus, a RESTful API is one that implements that architectural pattern.)
All of your static web content—including HTML, CSS, JavaScript, images, and other files—will be hosted by AWS Amplify. We selected the Amplify service because it makes it straightforward to host and deploy static websites. Your end users will access your site using the URL exposed by Amplify.
If you are nervous about working with so many new things, don't worry! You won't use other AWS services right now, and you also don't need to run any web servers to make your website available. (A "server" is software or a hardware device that accepts and responds to requests made over a network.)
For most real applications, you will want to use a custom domain to host your site. A custom domain is a unique branded name that identifies a website, such as www.amazon.com. If you're interested in this, Amplify provides support for custom domains as well.
What you will accomplish
In this module, you will:
Create an Amplify app
Upload files for a website directly to Amplify
Deploy new versions of a webpage with Amplify
Key concepts
Static website – A static website has fixed content, unlike dynamic websites. Static websites are the most basic type of website and are the easiest to create. All that is required is creating a few HTML pages and publishing them to a web server.
Web hosting – Provides the technologies/services needed for the website to be viewed on the internet.
AWS Regions – Separate geographic areas that AWS uses to house its infrastructure. These are distributed around the world so that customers can choose a Region closest to them to host their cloud infrastructure there.
Implementation
Create a web app with Amplify console
Open your favorite text editor on your computer. Create a new file and paste the following HTML in it:
Save the file as index.html.
ZIP (compress) only the HTML file.
In a new browser window, log into the Amplify console. Note: We will be using the Oregon (us-west-2) Region for this tutorial.
In the Get Started section, under Host your web app, choose the orange Get started button.
Select Deploy without Git provider. This is what you should see on the screen:
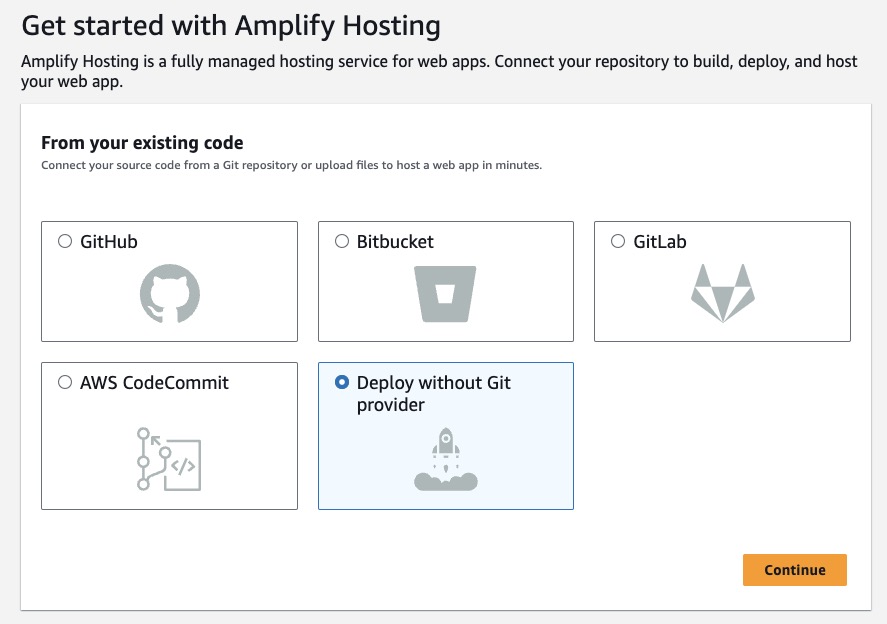
Choose the Continue button.
In the App name field, enter GettingStarted.
For Environment name, enter dev.
Select the Drag and drop method. This is what you should see on the screen:
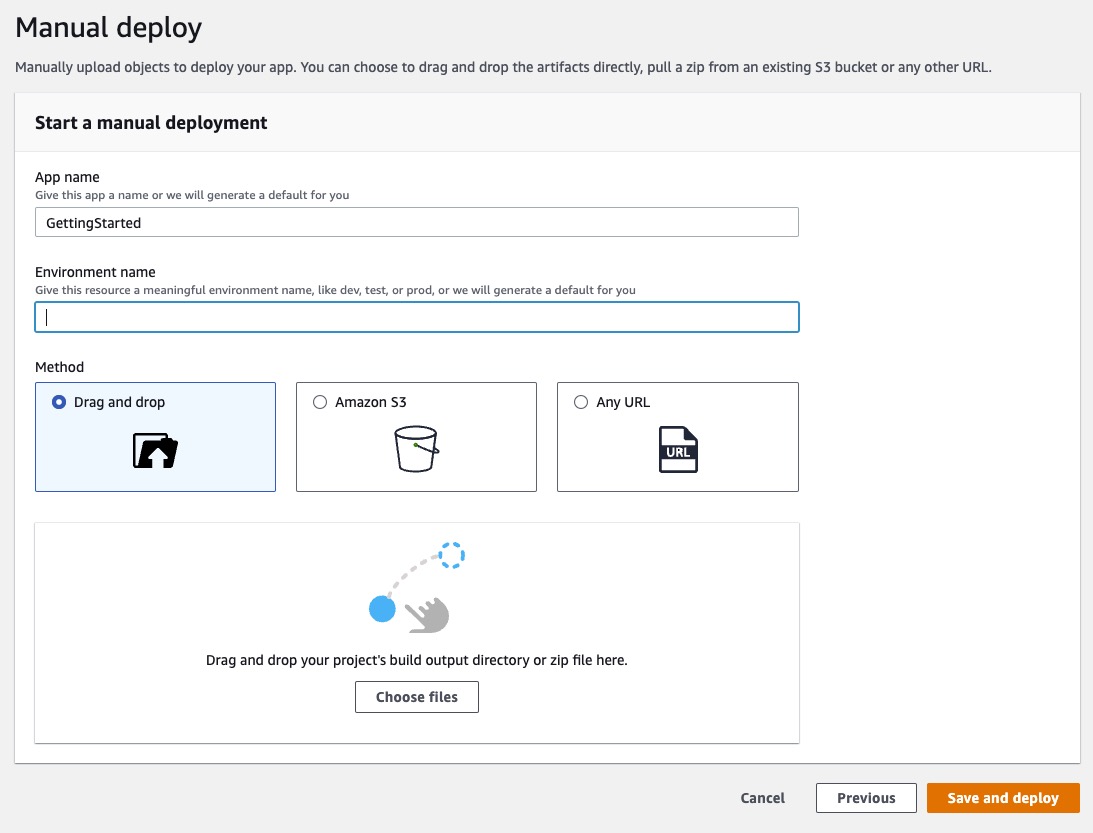
Choose the Choose files button.
Select the ZIP file created in step 3.
Choose the Save and deploy button.
After a few seconds, you should see the message Deployment successfully completed.
Test your web app
Select Domain Management in the left navigation menu.
Copy and paste the URL displayed in the form into your browser.
Your web app will load in a new browser tab and render "Hello World." Congratulations!
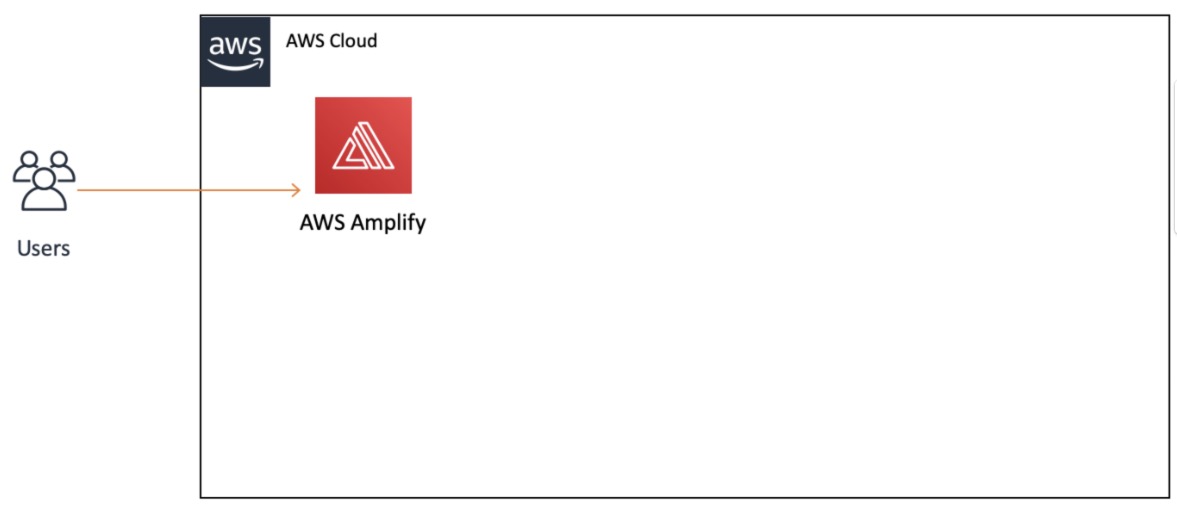
Application Architecture
Here is what out architecture looks like right now:
Module 2: Build Serverless Function
Overview
In this module, you will be writing a small piece of code, in Python, JavaScript, or Java, to be used in a later module to add interactivity to your web page. You will use AWS Lambda, a compute service that lets you create serverless functions, eliminating the need for you to manage software and hardware. Instead, applications are broken up into individual functions that can be invoked and scaled individually.
These serverless functions are triggered based on a specific event you will define in the code. It is also a very affordable service, because you are only charged for the number of events you process, not the idle time. Best of all, you do not have to worry about managing any servers.
What you will accomplish
In this module, you will:
Create a Lambda function from scratch using the AWS console (in Python, JavaScript, or Java)
Create (JSON) events in the AWS console to test your function
Key concepts
Compute service – A service that provides computational processing power.
Serverless function – Piece of code that will be executed by a compute service, on demand.
Lambda trigger – The type of event that will make a Lambda (serverless) function run. This can be another AWS service or an external input.
Implementation
Create and configure your Lambda function
In a new browser tab, log in to the AWS Lambda console.
Make sure you create your function in the same Region in which you created the web app in the previous module. You can see this at the very top of the page, next to your account name.
Choose the orange Create function button.
Under Function name, enter HelloWorldFunction.
Select your runtime from the runtime dropdown and leave the rest of the defaults unchanged.
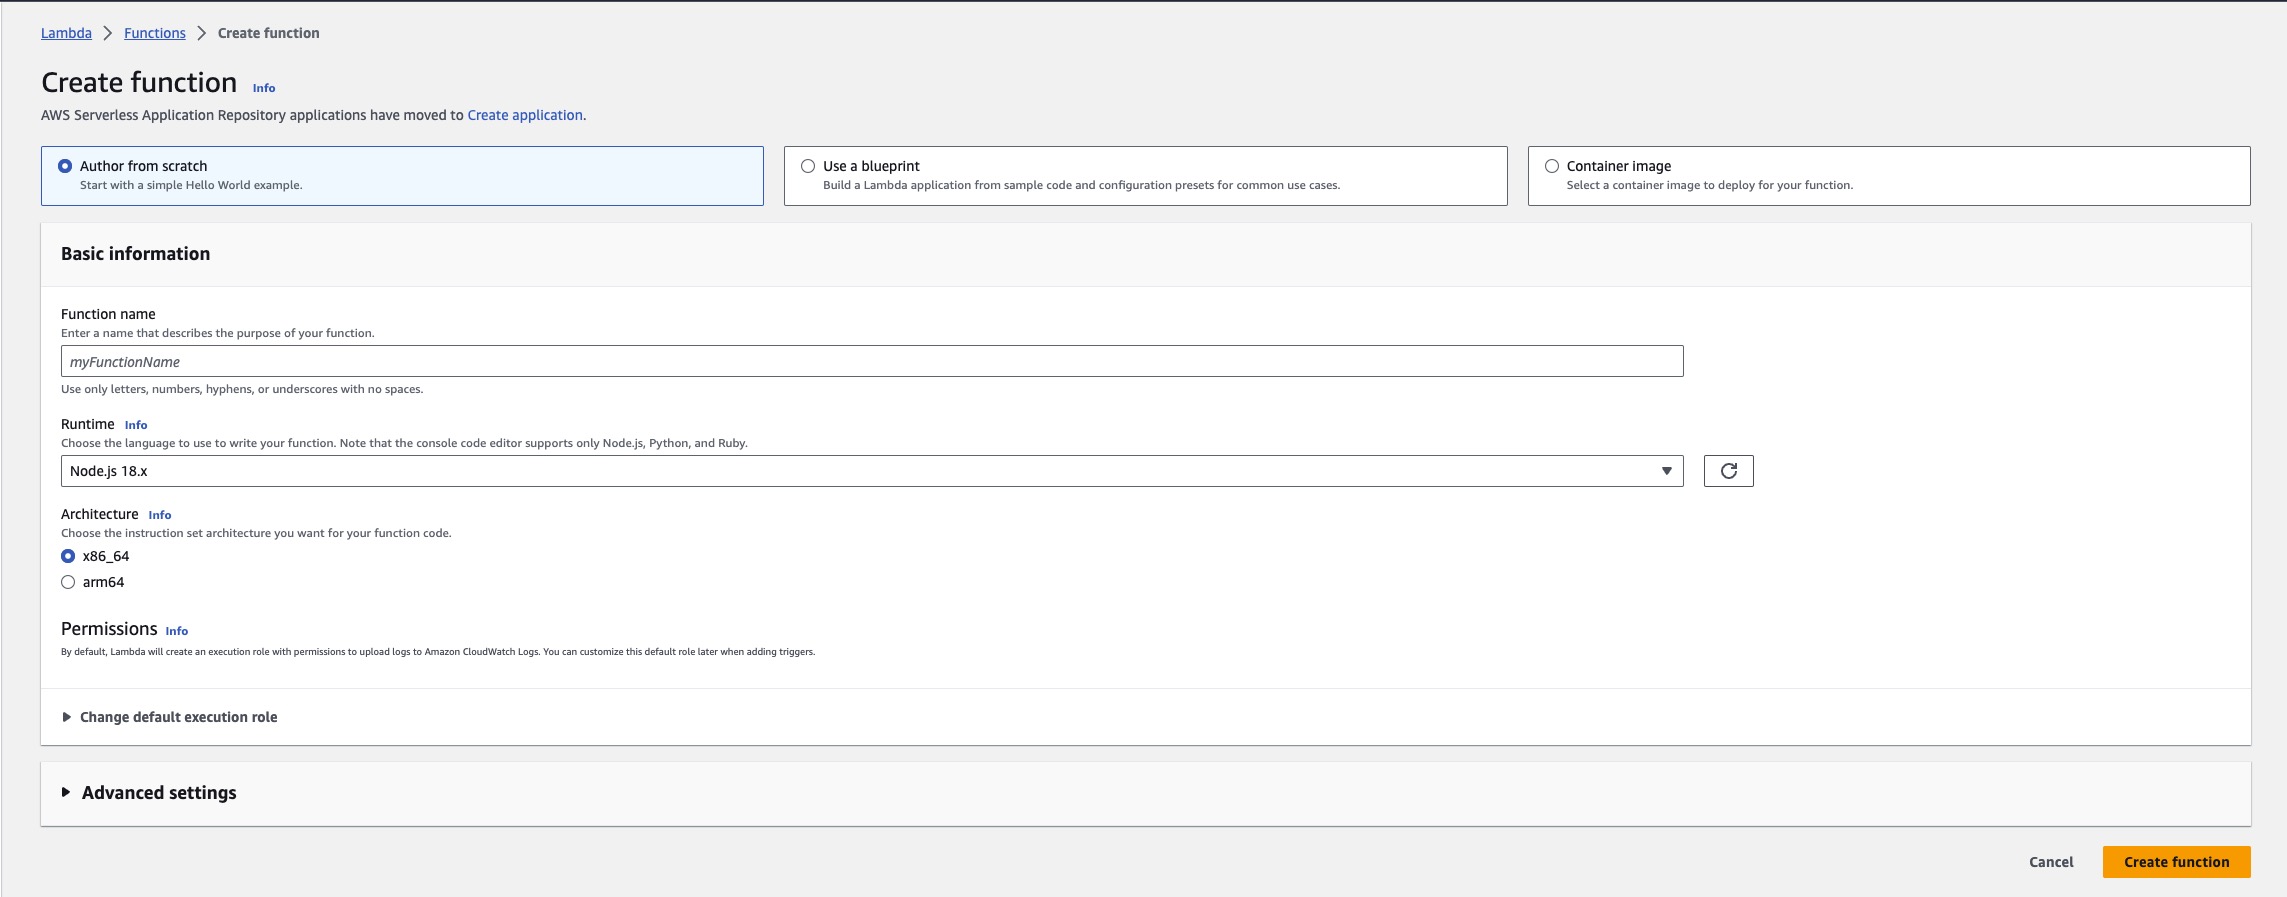
Choose the orange Create function button.
You should see a green message box at the top of your screen with the following message "Successfully created the function HelloWorldFunction ."
Under Code source, replace the code in the lambda_function with the following:
Save by going to the file menu and selecting Save to save the changes.
Choose Deploy to deploy the changes.
Let's test our new function. Choose the Test button to create a test event by selecting **Configure test event **.

Under Event name, enter HelloWorldTestEvent.
Copy and paste the following JSON object to replace the default one:
Choose the Save button at the bottom of the page.
Test your Lambda function
Under the HelloWorldFunction section at the top of the page, select Test tab.
You should see a light green box at the top of the page with the following text: Execution result: succeeded. You can choose Details to see the event the function returned.
Well done! You now have a working Lambda function.
Architecture
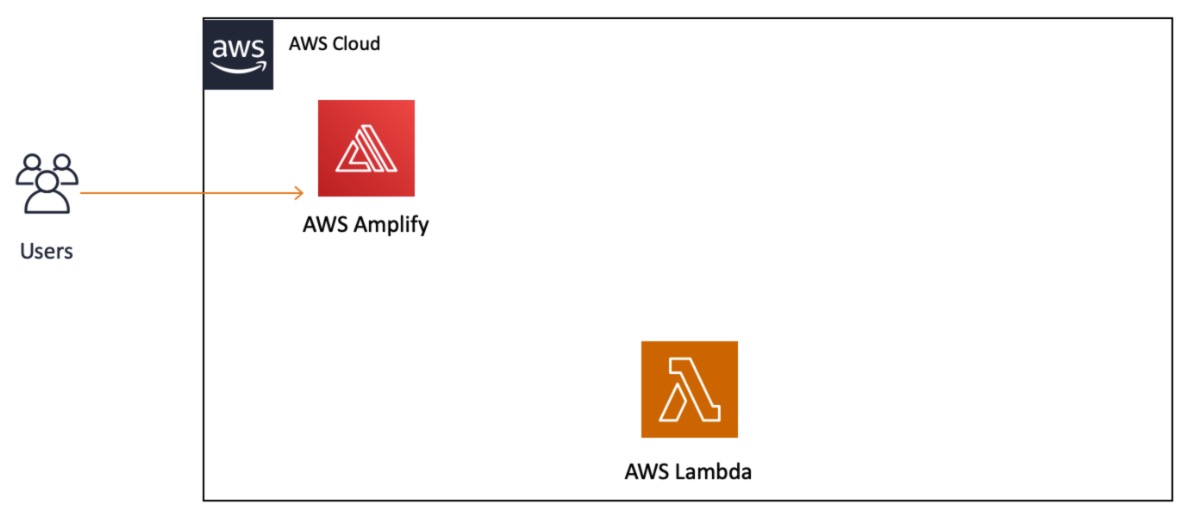
You will notice we added the AWS Lambda service to the diagram, but it does not yet have a connection to AWS Amplify or our users. We will build that out in the next module.