Front-End Developer
AWS Learning Path
Introduction
What is a Front-End Developer?
As a front-end or mobile developer, you build feature-rich web and mobile applications. You use popular front-end web or mobile frameworks including React, React Native, Vue, Angular, Iconic or iOS/Android to build the presentation layer of your app (e.g., the layout, the positioning of text and images, colors, fonts, buttons, etc.). You also work with backend APIs and services to add interactivity to your web or mobile application.
Using Amplify, you can use your existing front-end skillset to add cloud functionality into your application such as auth, data, analytics, push notifications, and more.
Objectives
Host Web or Mobile Application
Build and host a web or mobile application on the AWS Global content delivery network (CDN).
Add Authentication
Add authentication to your application to enable sign-in and sign-out.
Add Database and Storage
Add a GraphQL API, database, and storage solution to your application.
Build a Full-Stack React Application
Create a simple web application using AWS Amplify
Introduction: Build a Full-Stack React Application
Overview
In this tutorial, you will create a simple full-stack web application using AWS Amplify, a set of tools and services including a web hosting service. In the first module, you will build and host a React application on AWS. Through the remaining four modules, you will initialize a local app using the CLI, add authentication, add a GraphQL API and database, and update your app to store images.
What you will accomplish
This tutorial will walk you through the steps to create a simple web application discussed above. You will learn:
Hosting: Build and host a React application on the AWS global content delivery network (CDN)
Authentication: Add auth to your app to activate sign-in and sign-out
Database and storage: Add a GraphQL API, database, and storage solution
Module 1: Deploy and Host a React App
In this module, you will create a React application and deploy it to the cloud using the AWS Amplify web hosting service
Overview
AWS Amplify provides a Git-based CI/CD workflow for building, deploying, and hosting single-page web applications or static sites with serverless backends. Upon connecting to a Git repository, Amplify determines the build settings for both the frontend framework and any serverless backend resources configured with the Amplify CLI, and automatically deploys updates with every code commit.
In this module, we will begin by creating a new React application and push it to a GitHub repository. Then, we will connect the repository to AWS Amplify web hosting and deploy it to a globally available content delivery network (CDN) hosted on an amplifyapp.com domain. Next, we will demonstrate continuous deployment capabilities by making changes to the React application and push a new version to the main branch, which will automatically kick off a new deployment.
What you will accomplish
In this module, you will:
Create a React application
Initialize a GitHub repository
Deploy your app with AWS Amplify
Implement code changes and redeploy your app
Key concepts
React application – React is a JavaScript web application library that enables developers to quickly build performant single-page applications.
Git – A version control system that allows developers to store files and maintain and update relationships between files and directories, versions, and changes to the files.
Implementation
Create a new React application
The easiest way to create a React application is by using the command create-react-app. Install this package using the following command in your command prompt or terminal:
Initialize GitHub repository
In this step, you will create a GitHub repository and commit your code to the repository. You will need a GitHub account to complete this step—if you do not have an account, sign up here.
a. Create a new GitHub repo for your app.
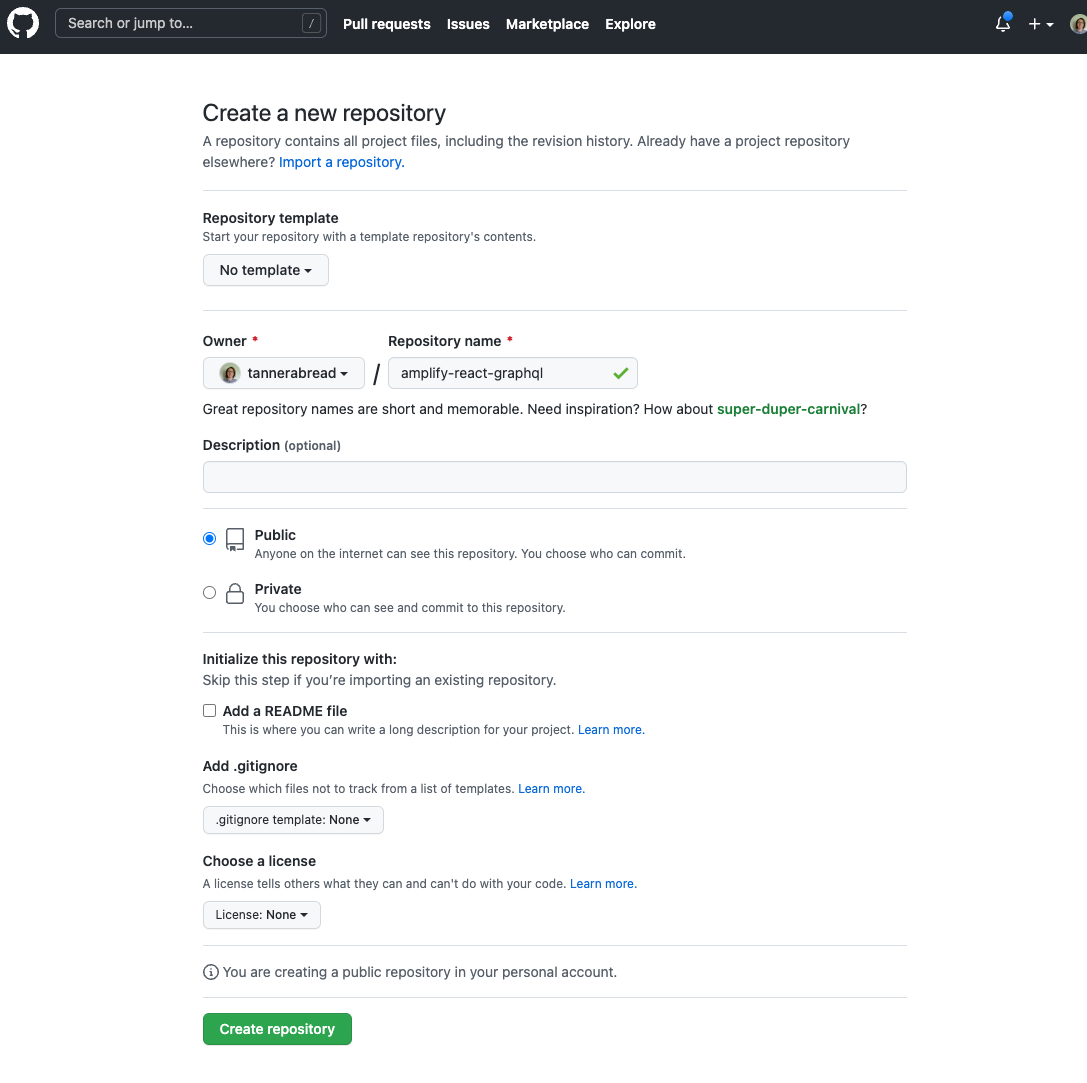
b. Open a new terminal and navigate back to your app's root folder, for example, amplifyapp.
c. Using create-react-app will automatically initialize the git repo and make an initial commit. If you are trying to deploy an existing React application where git has not been initialized, make sure to input the following commands before continuing:
d. If you have never used GitHub on your computer, follow these stepsbefore continuing to allow connection to your account.
Push the application to the new GitHub repo by executing the following commands in your command line interface:
Log into the AWS Management Console
Open the AWS Management Console in a new browser window, so you can keep this step-by-step guide open. When the screen loads, enter your user name and password to get started. Then enter Amplify in the search bar and select AWS Amplify to open the service console.
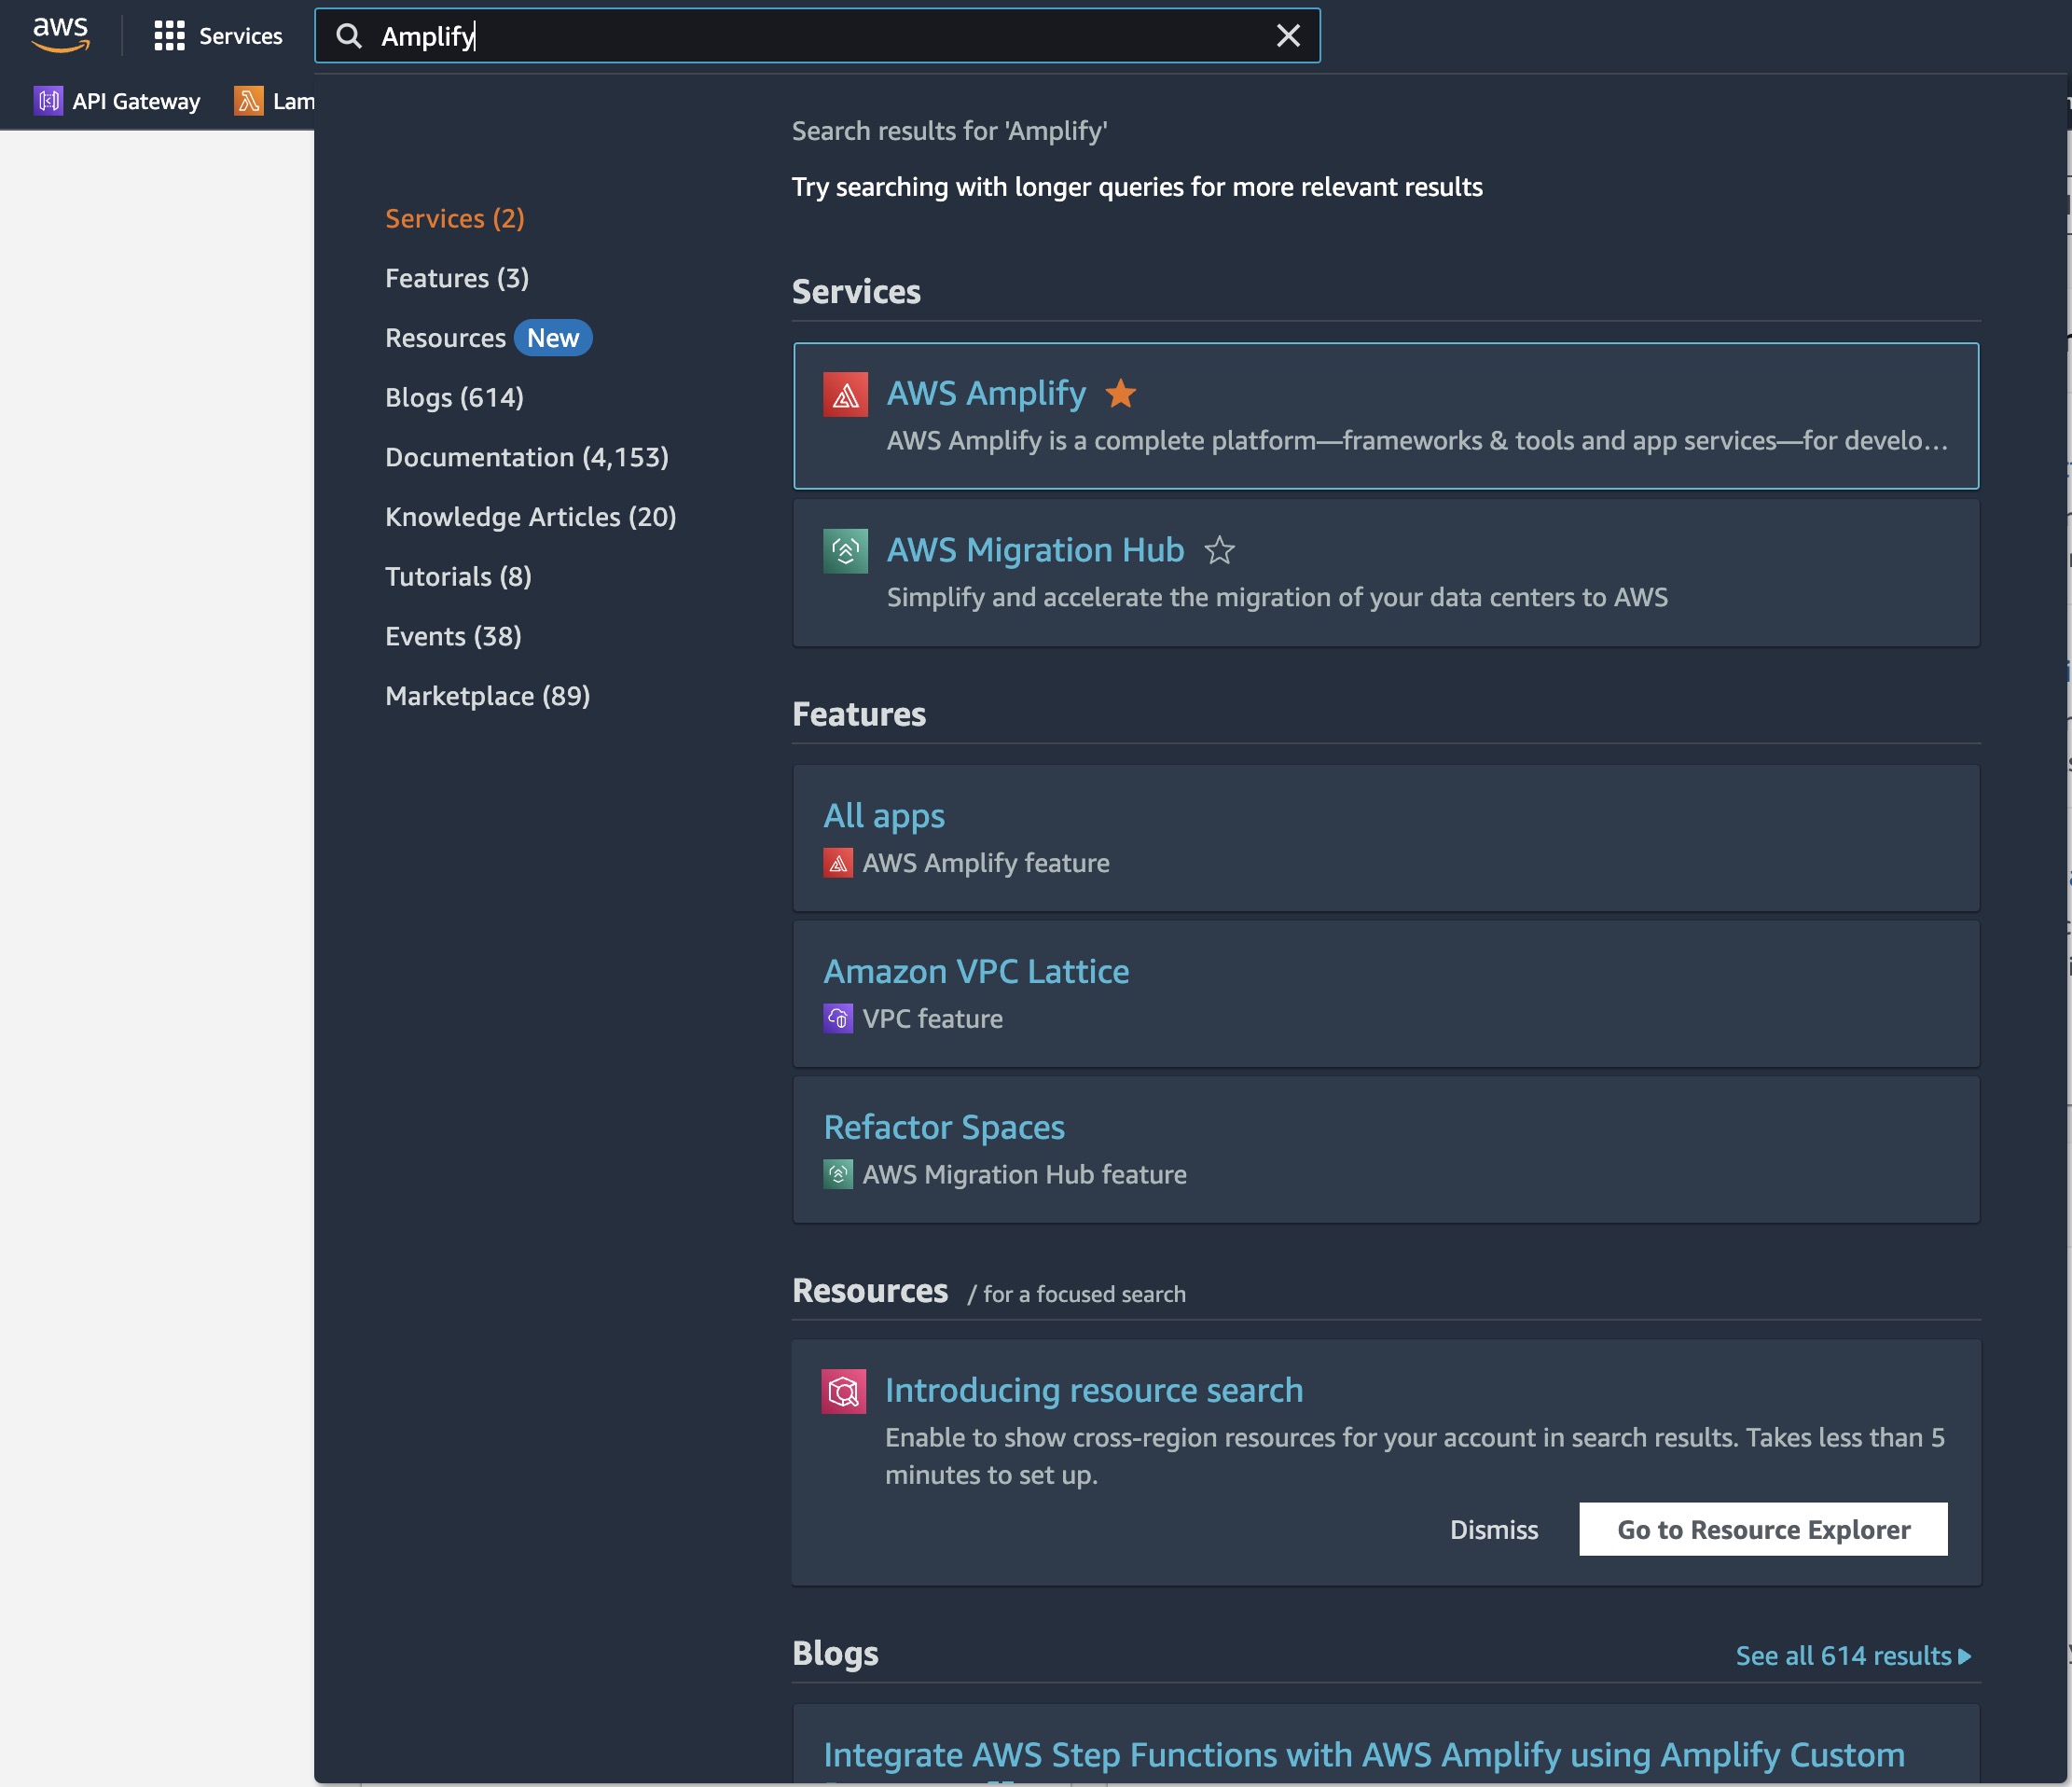
Deploy your app with AWS Amplify
In this step, you will connect the GitHub repository you just created to the AWS Amplify service. This will enable you to build, deploy, and host your app on AWS.
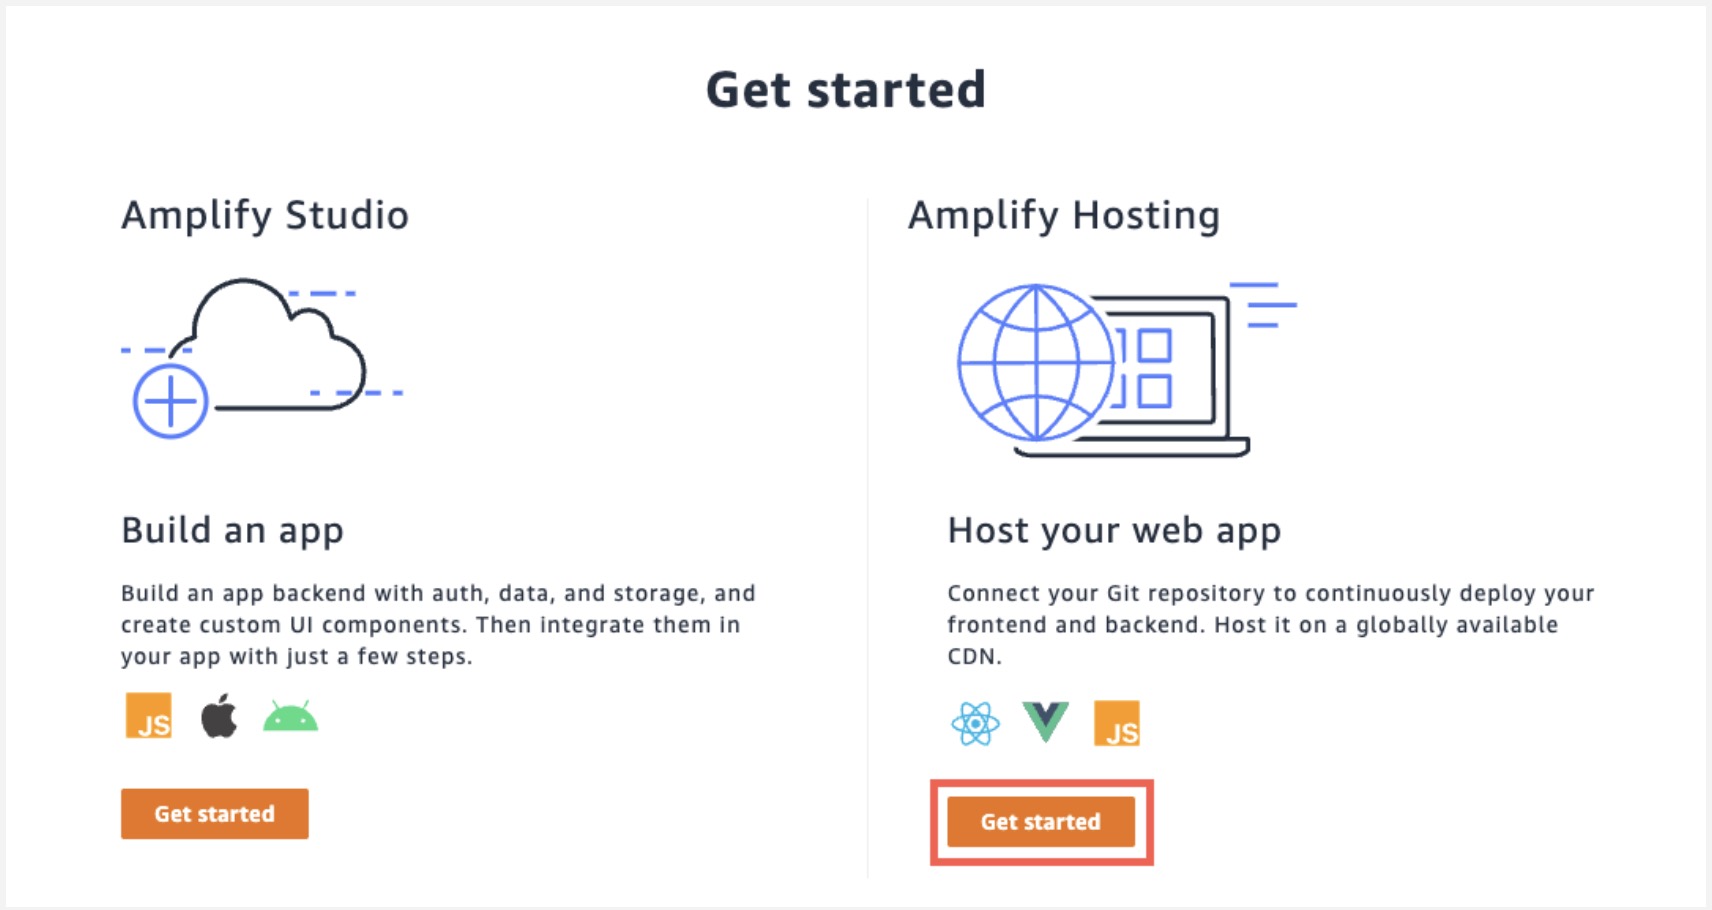
a. In the AWS Amplify service console, select Get Started under Amplify Hosting.
b. Select GitHub as the repository service and select Continue.
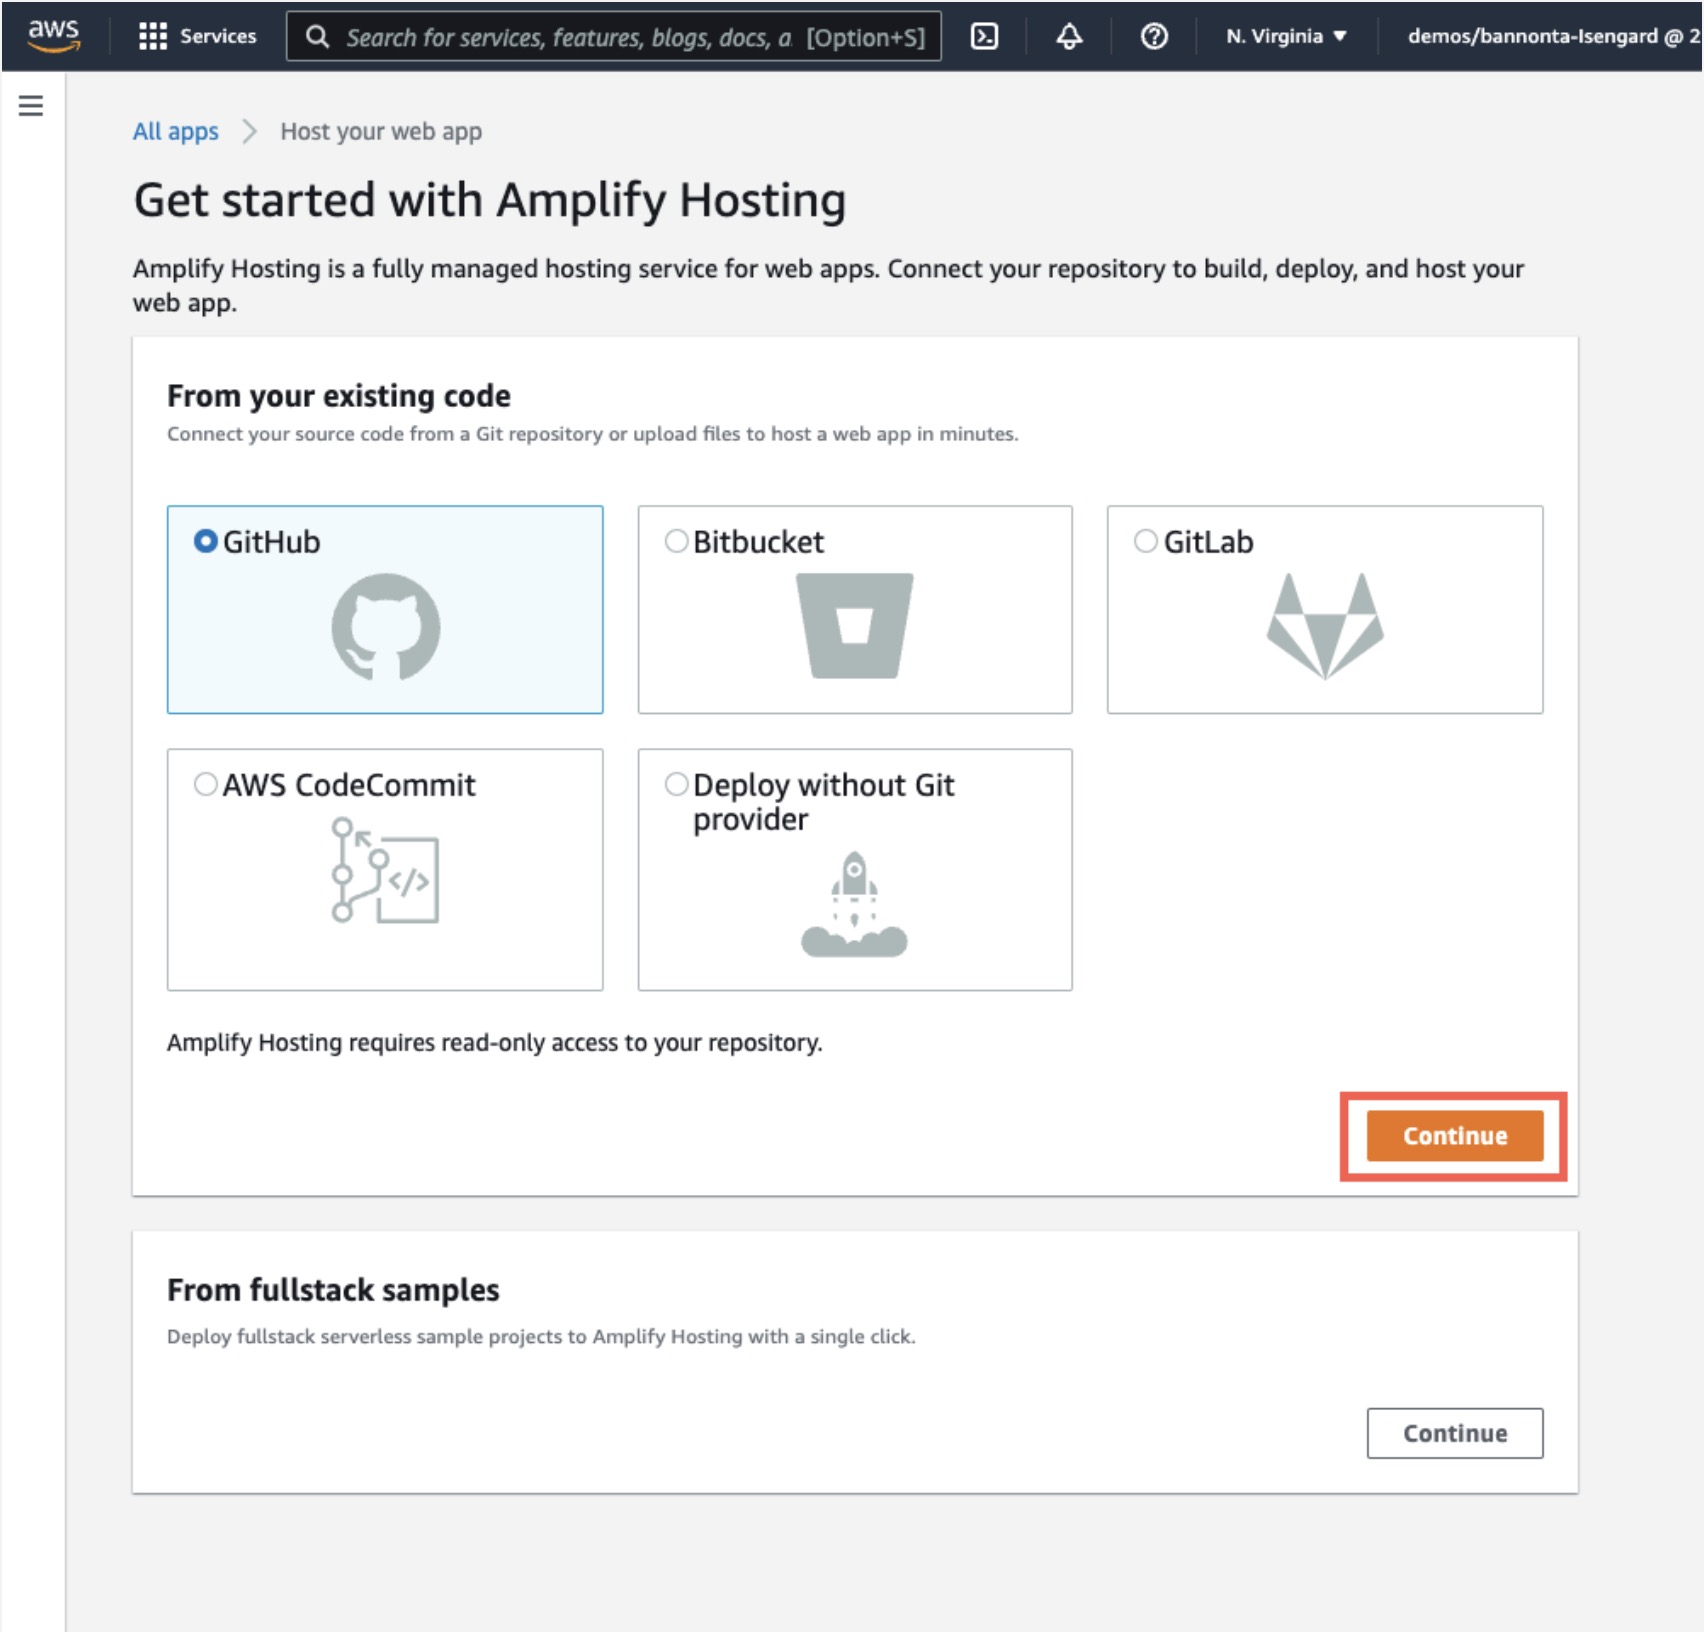
c. Authenticate with GitHub and return to the Amplify console. Choose the repository and main branch you created earlier, then select Next.
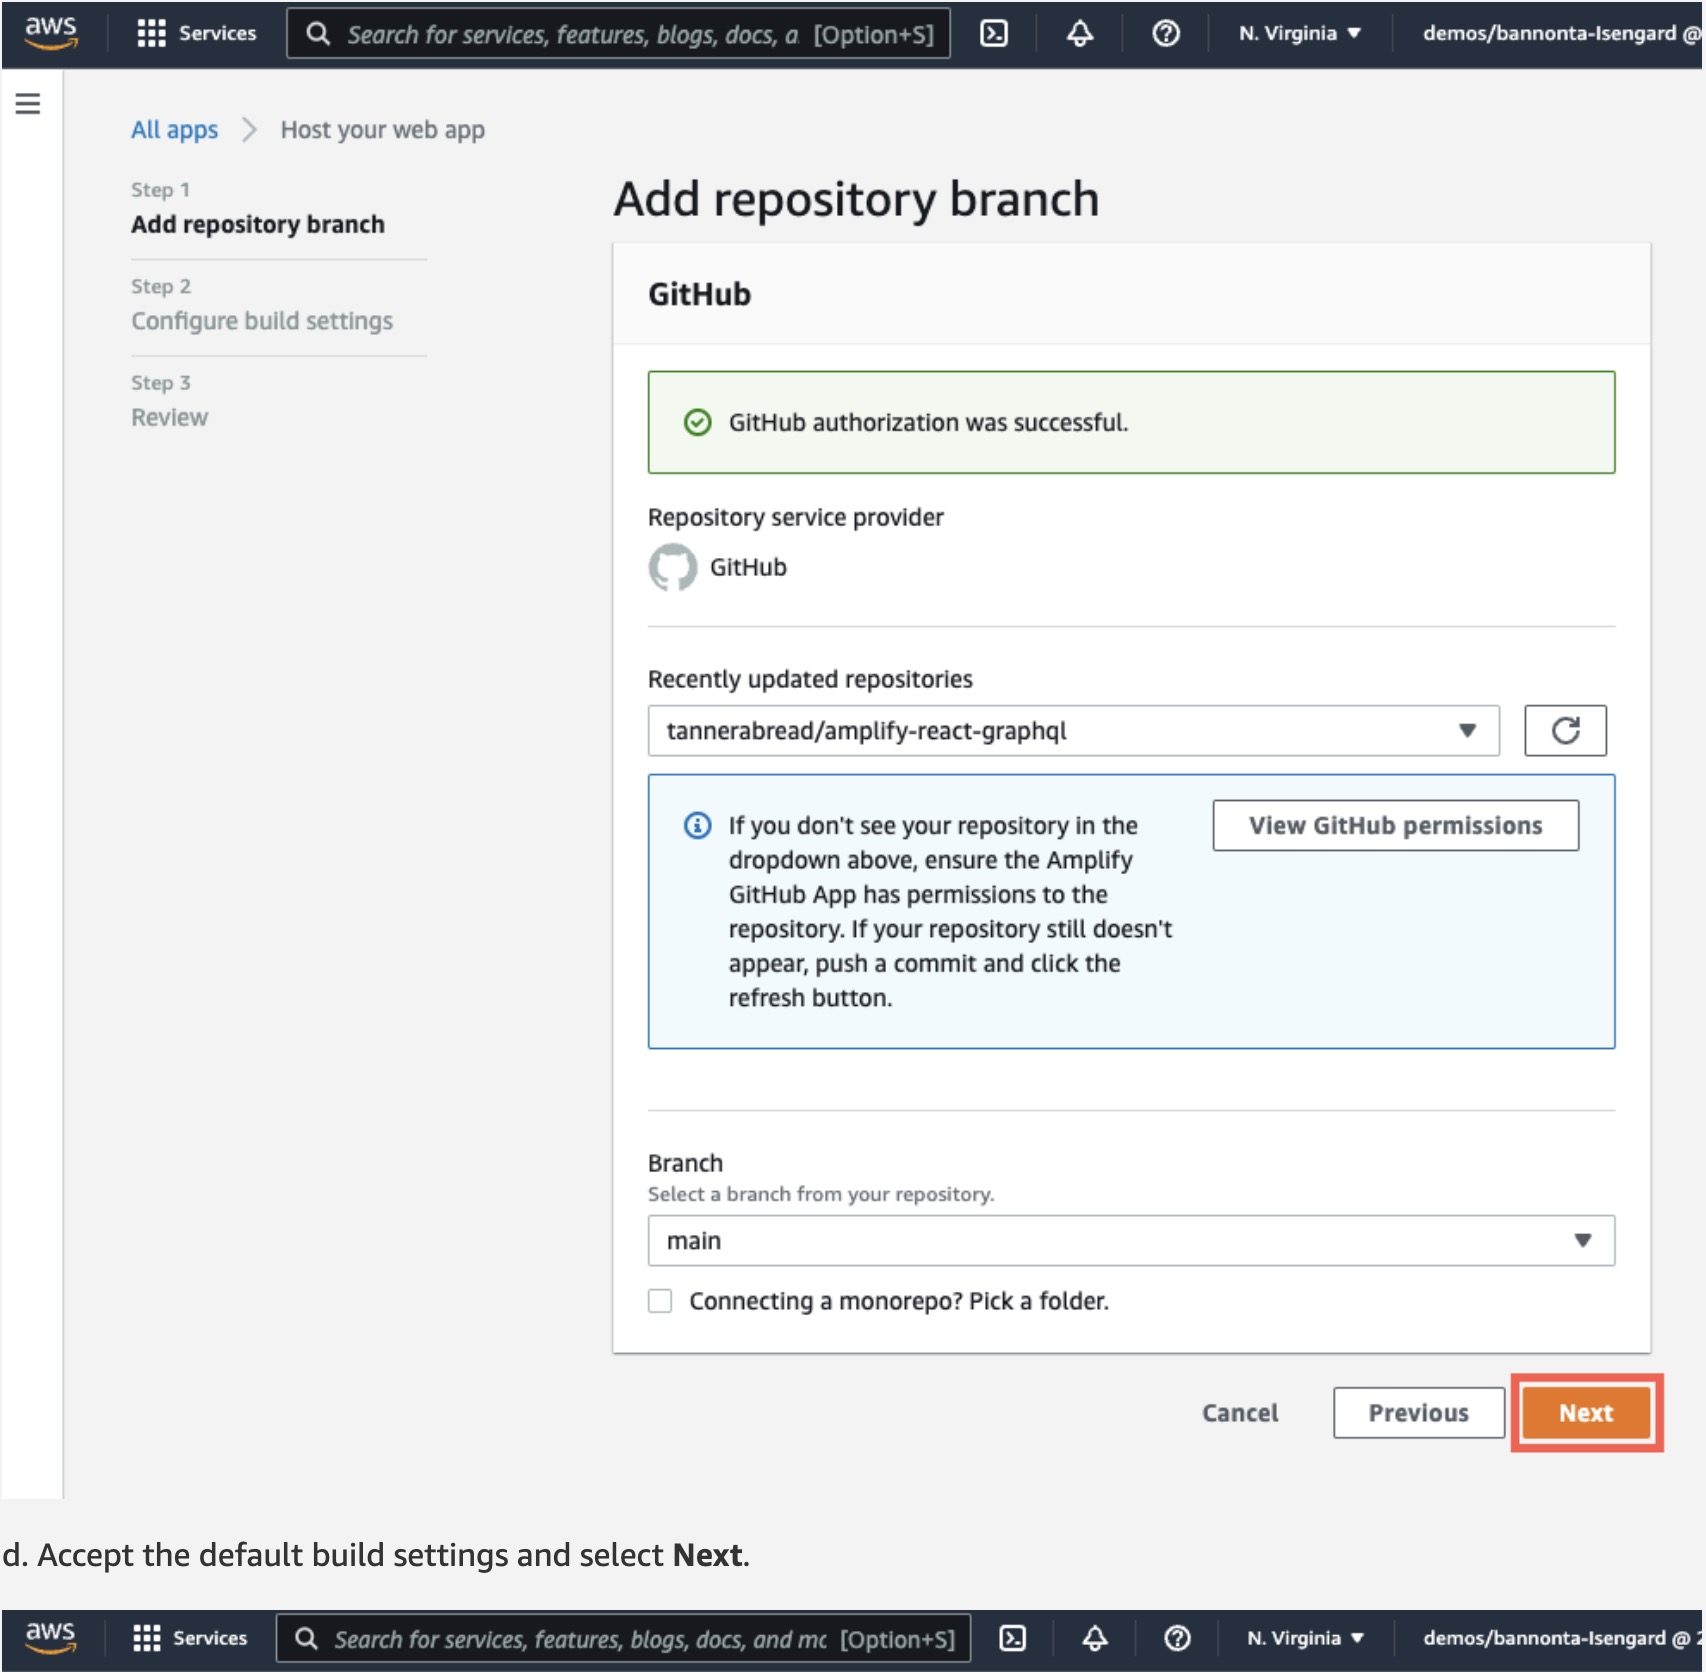
d. Accept the default build settings and select Next.

e. Review the final details and choose Save and deploy.
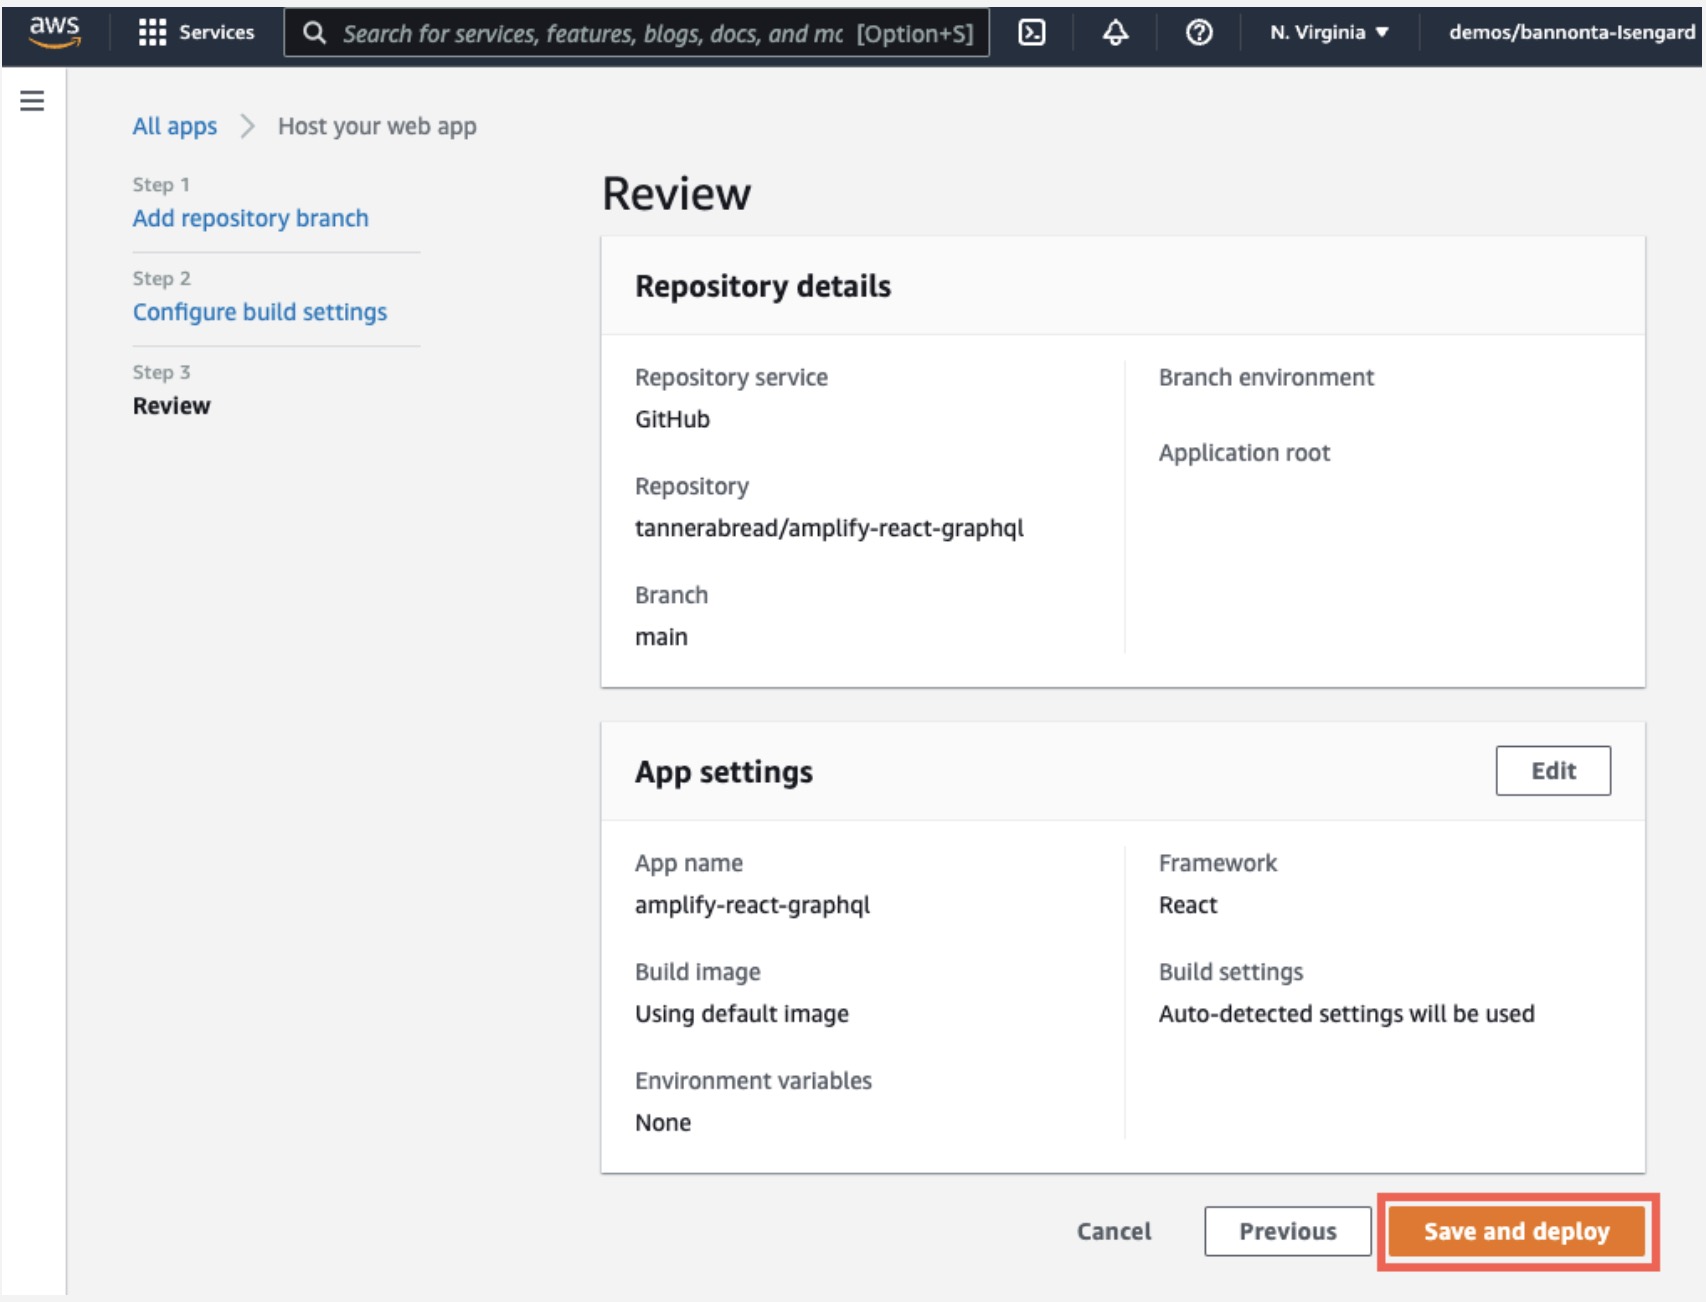
f. AWS Amplify will now build your source code and deploy your app at https://...amplifyapp.com.
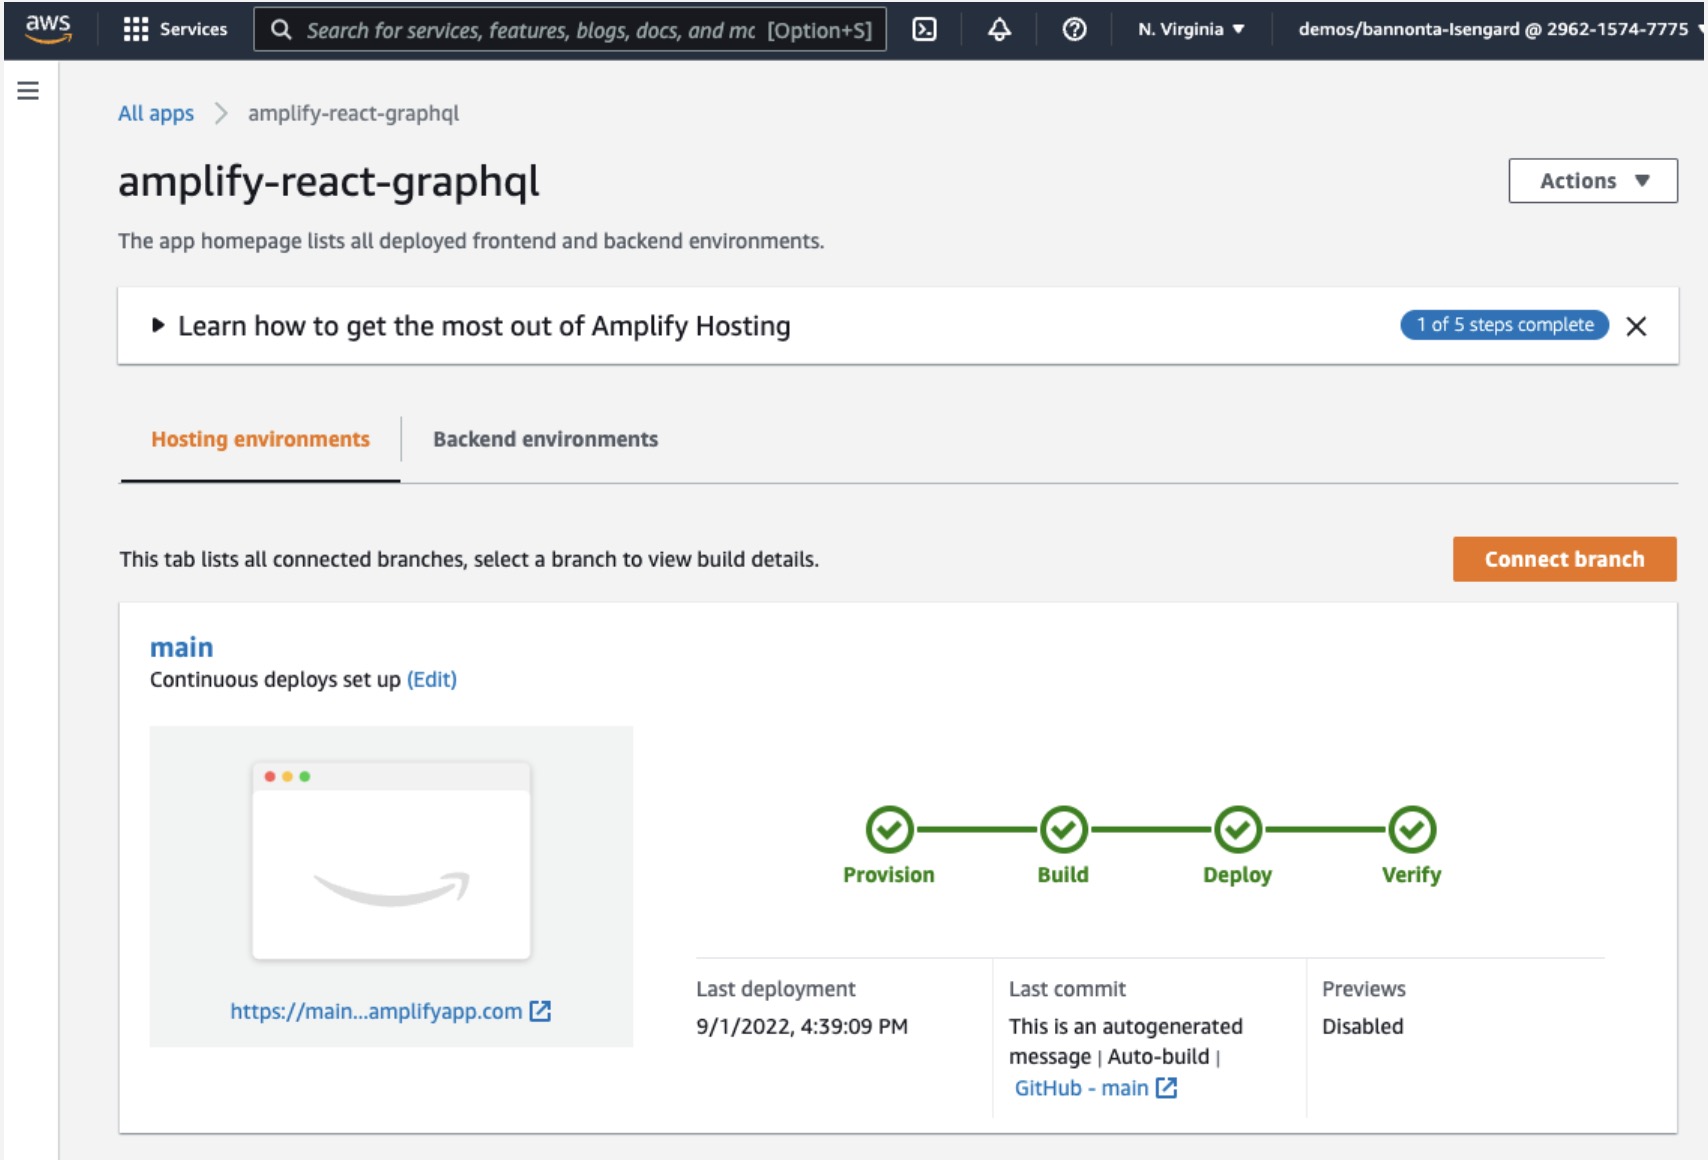
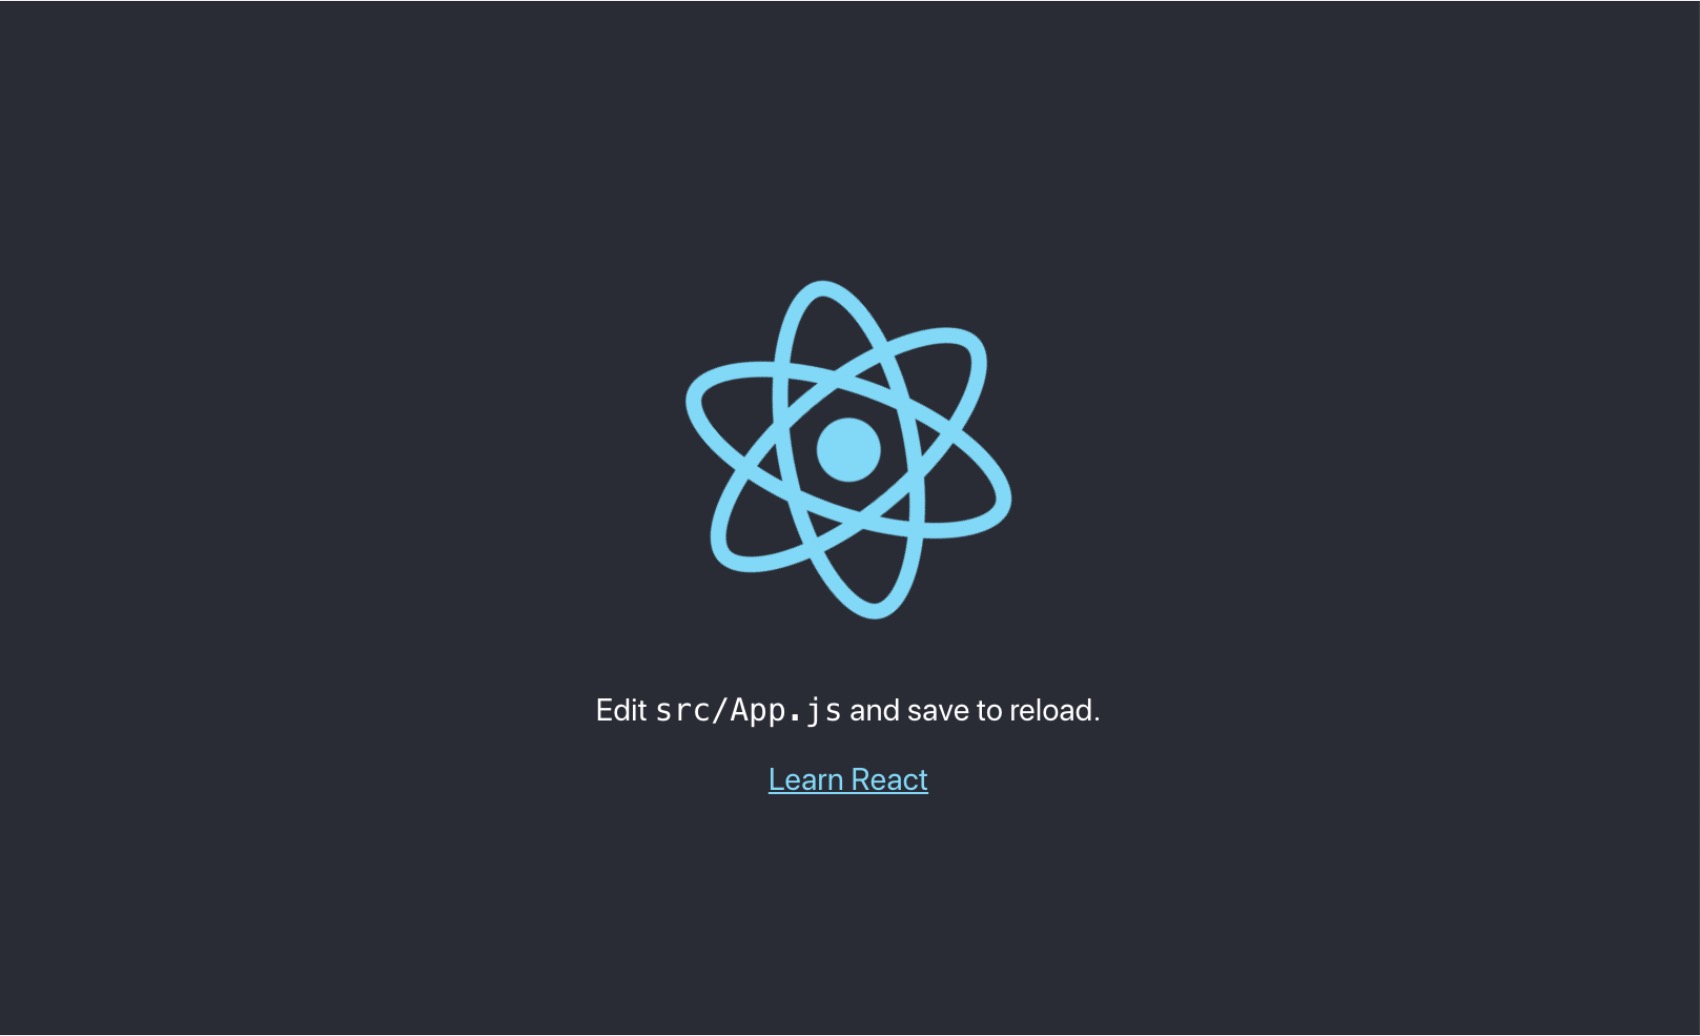
g. Once the build completes, select the thumbnail to see your web app up and running live.
Automatically deploy code changes
In this step, you will make some changes to the code using your text editor and push the changes to the main branch of your app.
a. Edit src/App.js with the code below and save.
b. Push the changes to GitHub in the command prompt (Windows) or terminal (macOS) to automatically kick off a new build:
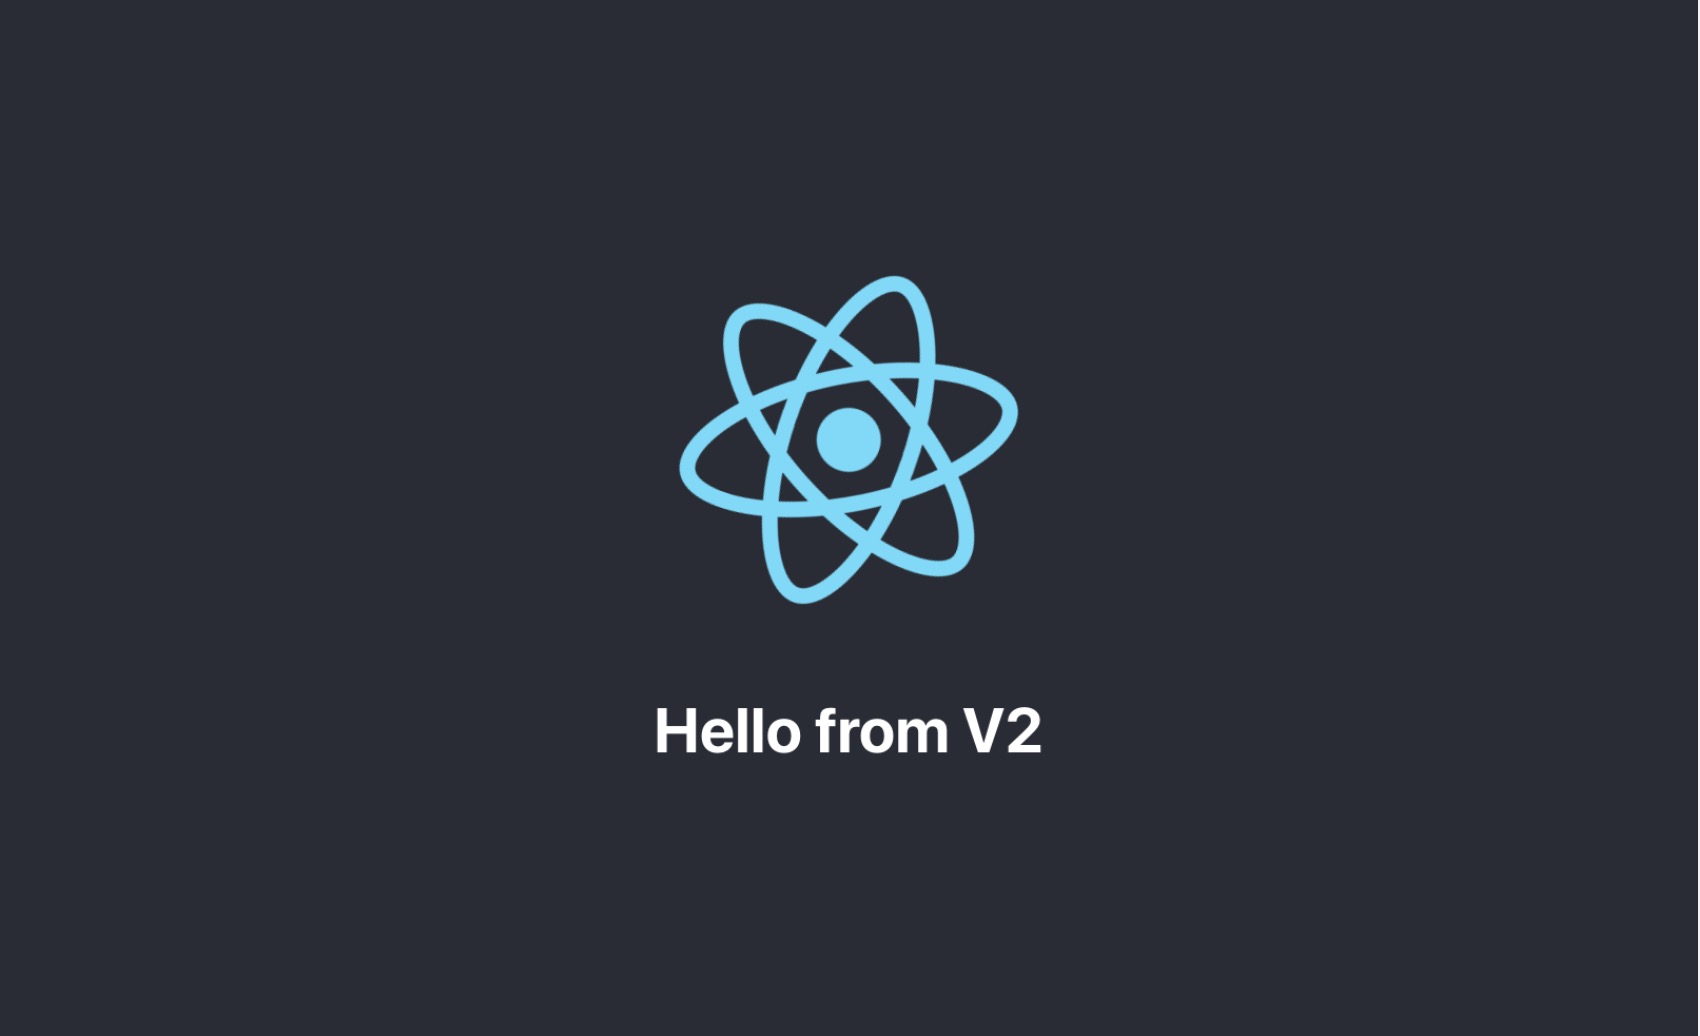
c. Once the build is complete, select the thumbnail in the AWS Amplify console to view your updated app.
Conclusion
You have deployed a React application in the AWS Cloud by integrating with GitHub and using AWS Amplify. With AWS Amplify, you can continuously deploy your application in the cloud and host it on a globally available CDN.
Next, we will create a local version of the app to continue development and add new features.
Module 2: Initialize a Local App
Overview
Now that we have initialized a new Amplify project in our account, we want to bring it down into our local environment, so we can continue development and add new features.
In this module, you will install the Amplify CLI and initialize the Amplify project using the CLI.
What you will accomplish
In this module, you will:
Install and configure the Amplify CLI
Initialize the Amplify app
Key concepts
Amplify CLI – The Amplify CLI allows you to create, manage, and remove AWS services directly from your terminal.
Implementation
Install the Amplify CLI
The Amplify command line interface (CLI) is a unified toolchain to create AWS Cloud services for your app, following a simple, guided workflow. Let’s go ahead and install the Amplify CLI using the command prompt (Windows) or the terminal ( macOS). Note: This command can be run in any directory in your command prompt/terminal because the “-g” indicates the binary will be installed globally on your system.
Configure the Amplify CLI
AWS Identity and Access Management (IAM) enables you to manage users and user permissions in AWS. The CLI uses IAM to create and manage services programmatically on your behalf through the CLI.
To configure the CLI, run the configure command. To see a video walkthrough of the CLI configuration process, see Installing & Configuring the AWS Amplify CLI below.
Initialize the Amplify app
Next, we will deploy a backend and initialize the backend environment locally.
a. In the Amplify console, select Backend environments and choose Get started. Wait for the backend to be deployed.
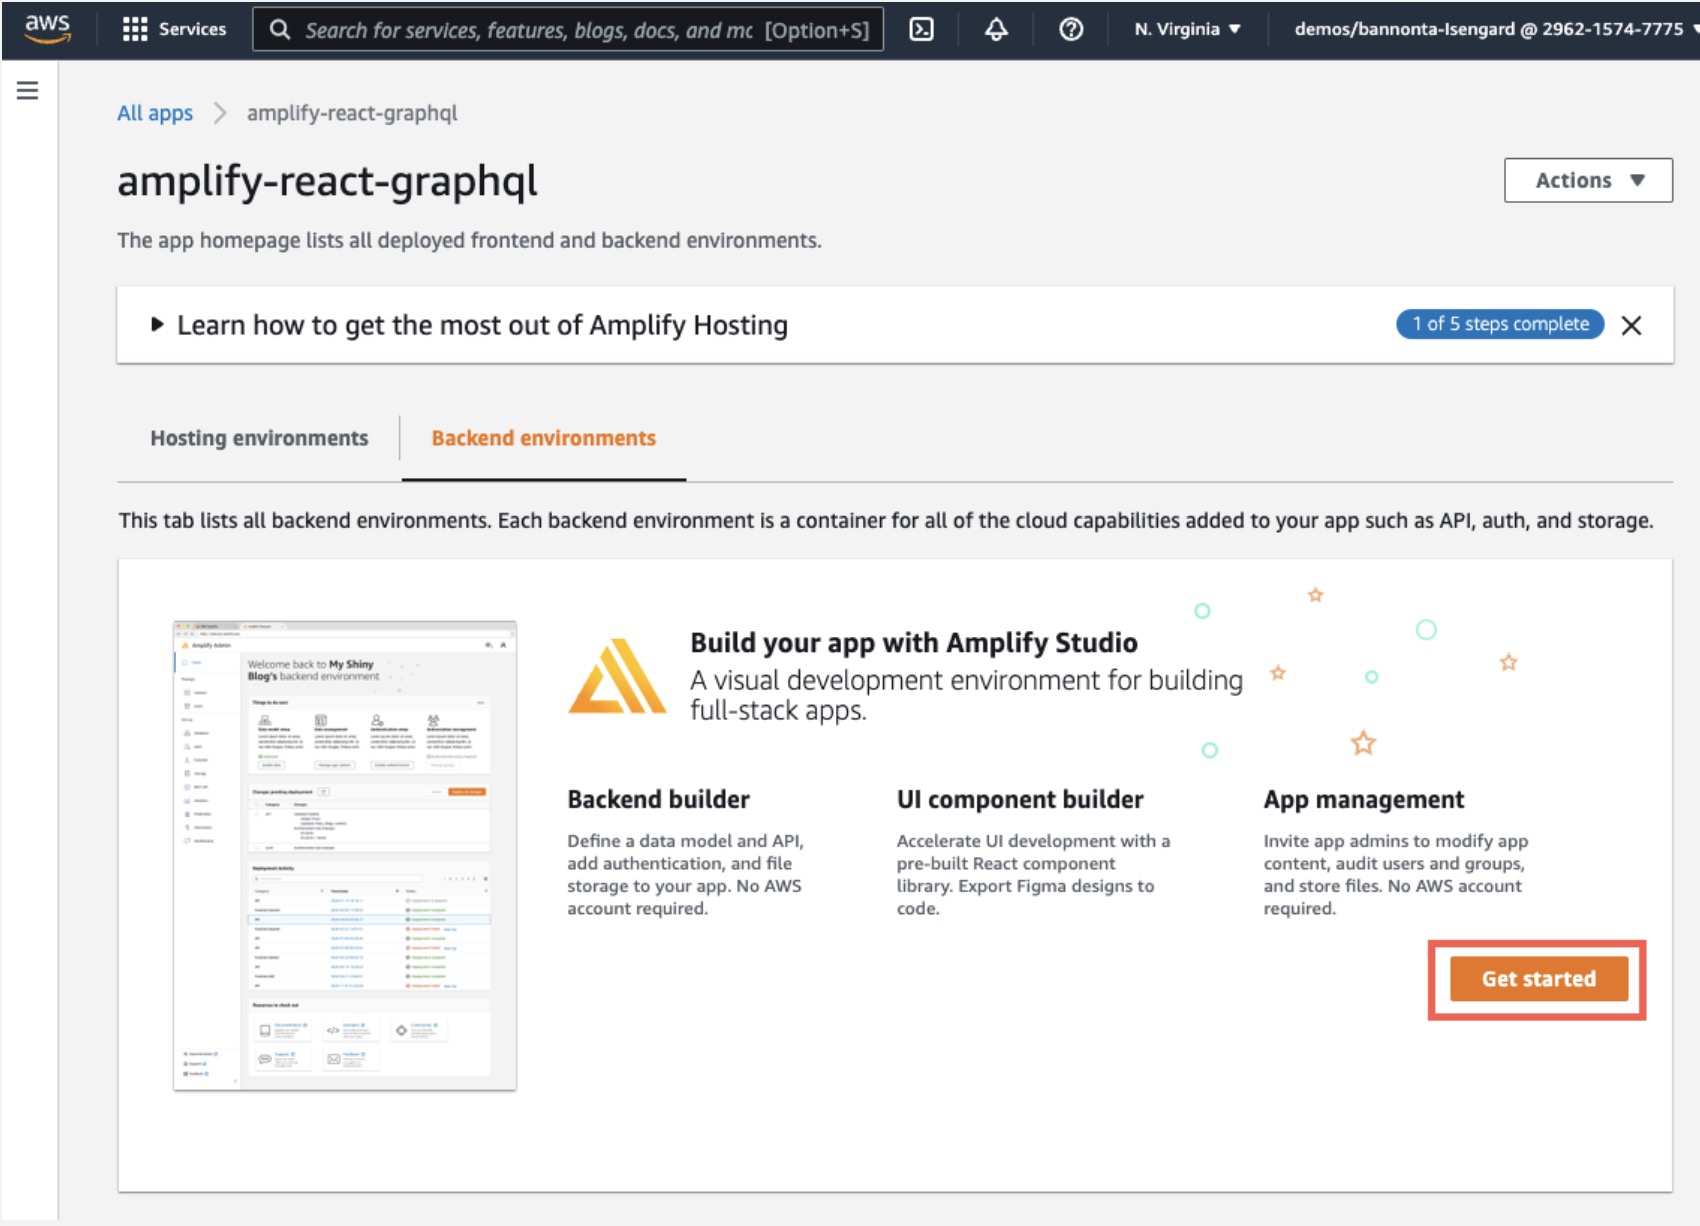
b. On the Backend environments tab, choose Launch Studio.
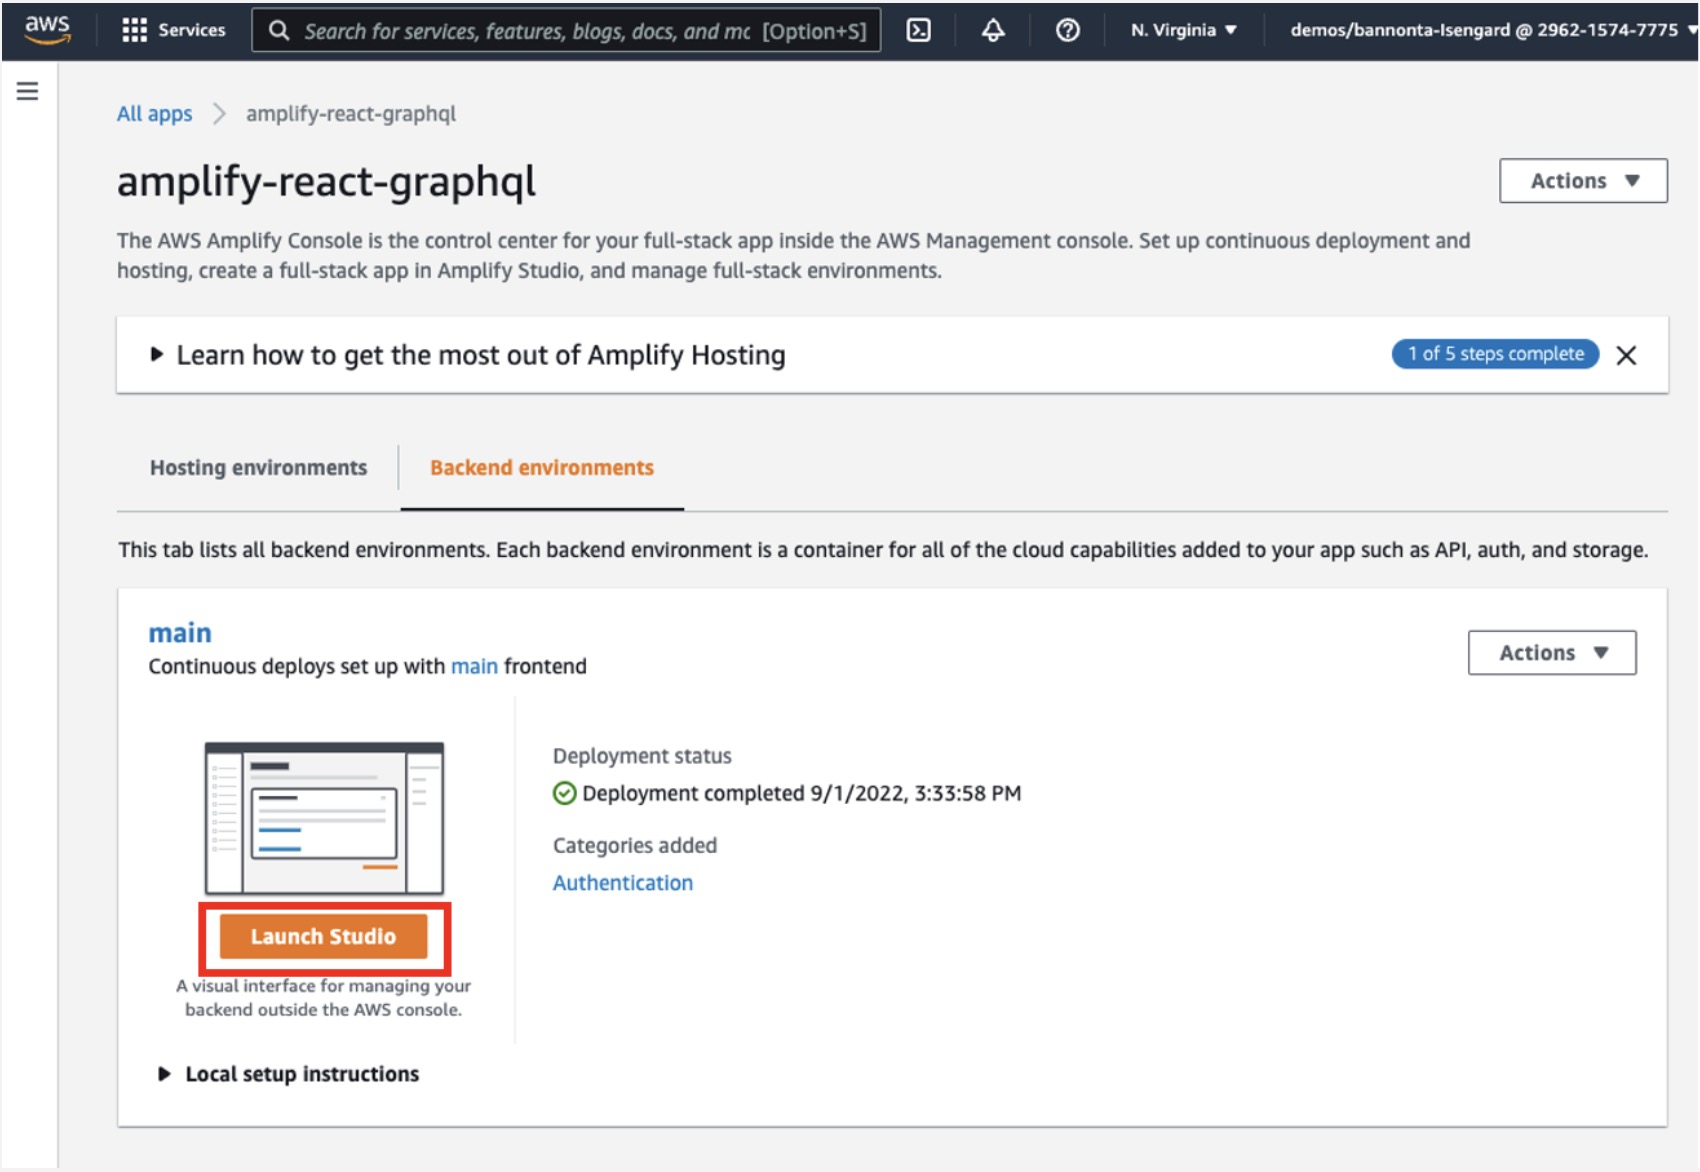
c. Return to the Backend environments tab and expand the Local setup instructions section. Copy the command to your clipboard and open the terminal on your computer.
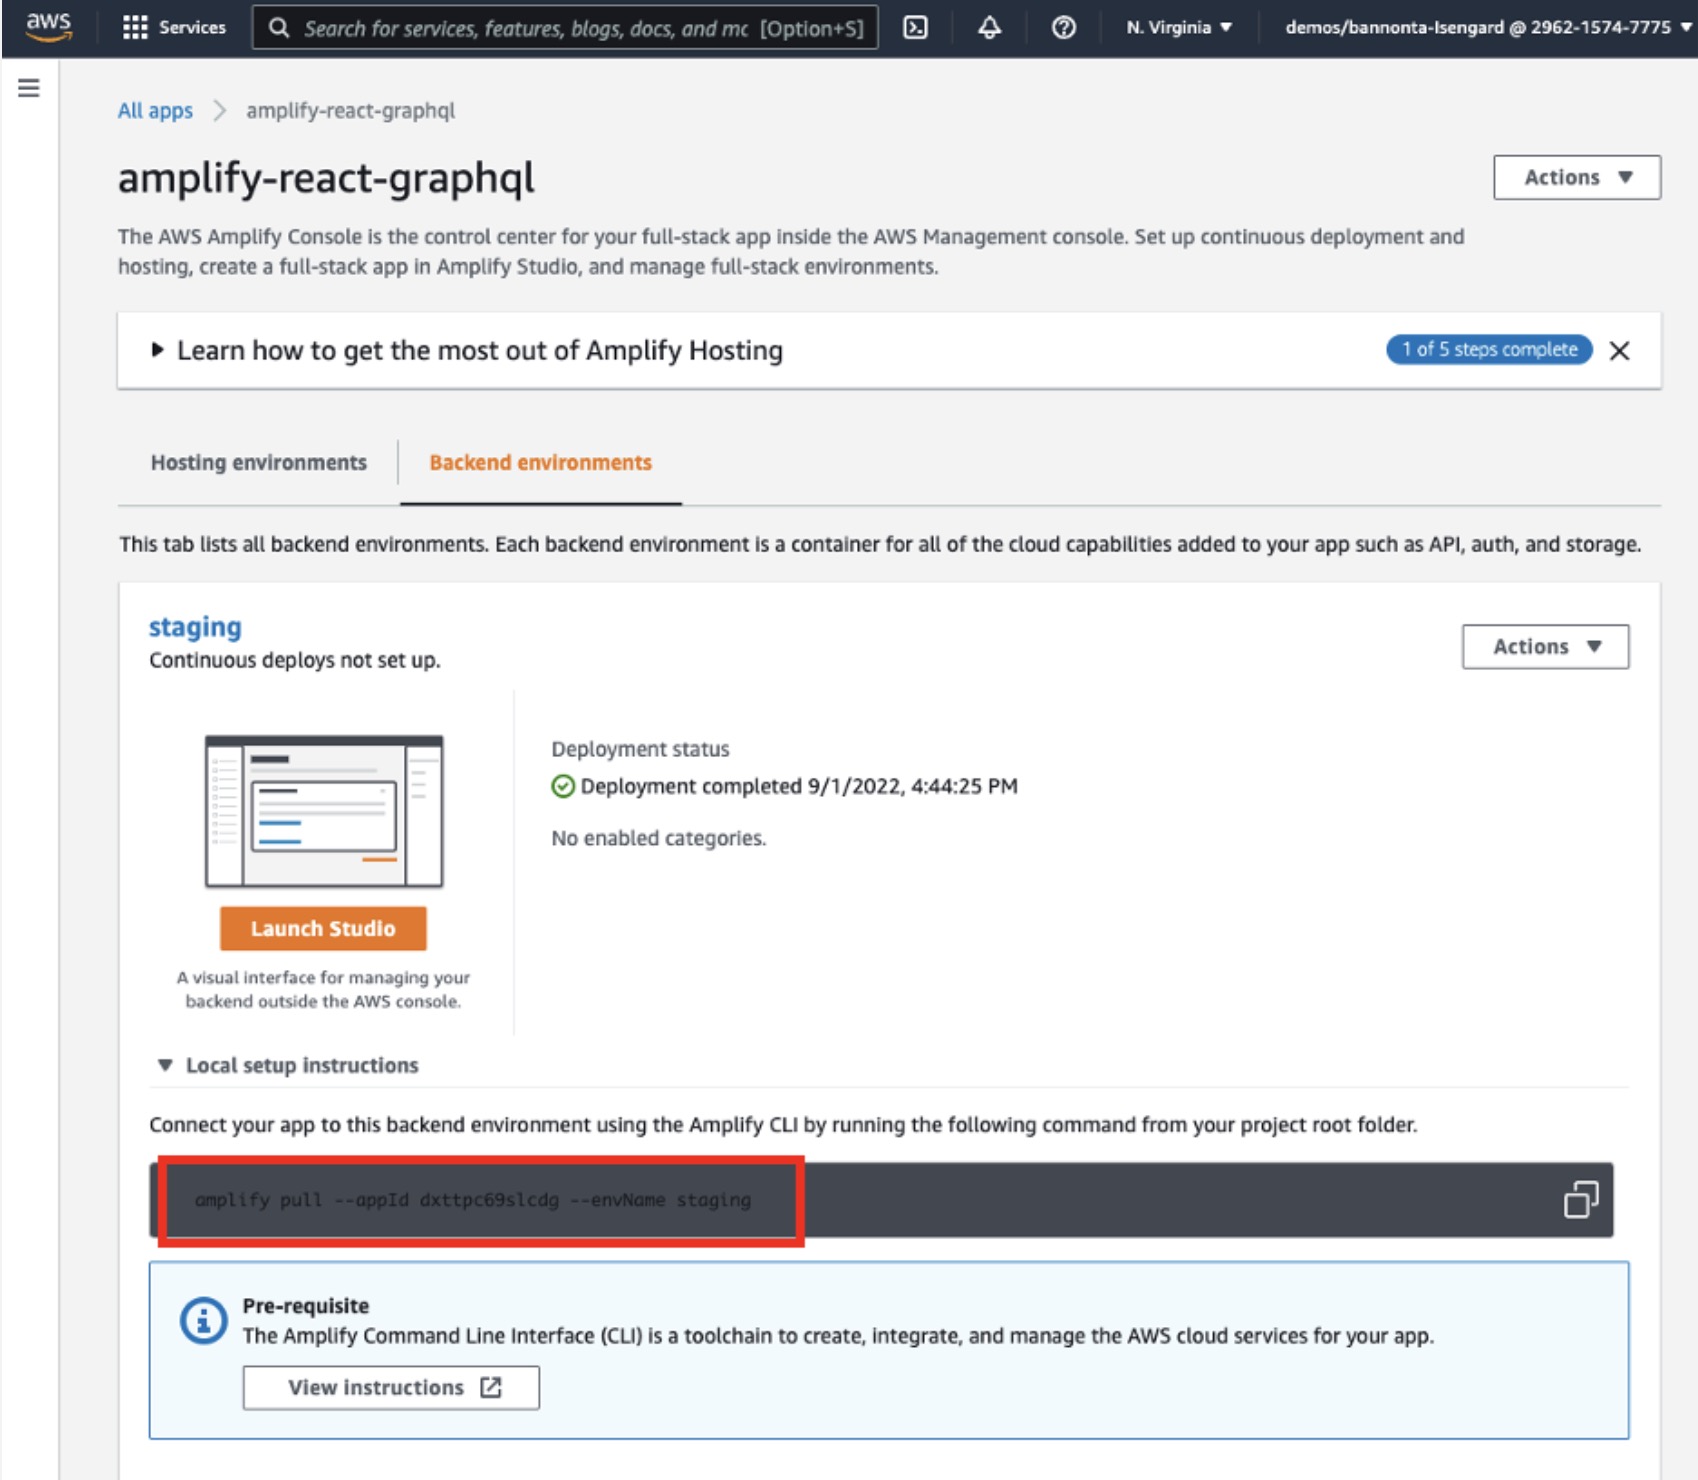
d. Paste the command into your terminal and follow the setup instructions.
Conclusion
You have initialized the Amplify project and are now ready to start adding features. In the next module, we will add an entire user authentication flow with just a few lines of code.
To view your Amplify project in the dashboard at any time, you can now run the following command:
Module 3: Add Authentication
Overview
The next feature you will be adding is authentication. In this module, you will learn how to authenticate a user with the Amplify CLI and libraries, leveraging Amazon Cognito, a managed user identity service.
You will also learn how to use the Amplify UI component library to scaffold out an entire user authentication flow, allowing users to sign up, sign in, and reset their password with just a few lines of code.
What you will accomplish
In this module, you will:
Install Amplify libraries
Create and deploy an authentication service
Configure your React app to include authentication
Key concepts
Amplify libraries – The Amplify libraries allow you to interact with AWS services from a web or mobile application.
Authentication – In software, authentication is the process of verifying and managing the identity of a user using an authentication service or API.
Implementation
Install the Amplify Libraries
We will need two Amplify libraries for our project. The main aws-amplify library contains all the client-side APIs for interacting with the various AWS services we will be working with, and the @aws-amplify/ui-react library contains framework-specific UI components. Install these libraries in the root of the project.
Create the authentication service
To create the authentication service, use the Amplify CLI:
Deploy the authentication service
Now that the authentication service has been configured locally, we can deploy it by running the Amplify push command:
Configure the React project with Amplify resources
The CLI has created and will continue to update a file called aws-exports.js located in the src directory of our project. We will use this file to let the React project know about the different AWS resources that are available in our Amplify project.
To configure our app with these resources, open src/index.js and add the following code below the last import:
Add the authentication flow in App.js
Next, open src/App.js and update with the following code:
In this code, we've used the withAuthenticator component. This component will scaffold out an entire user authentication flow allowing users to sign up, sign in, reset their password, and confirm sign-in for multifactor authentication (MFA). We have also added a Sign Out button to log users out.
Run the app locally
Wait for the resources to finish deploying and then run the app to see the new Authentication flow protecting the app:
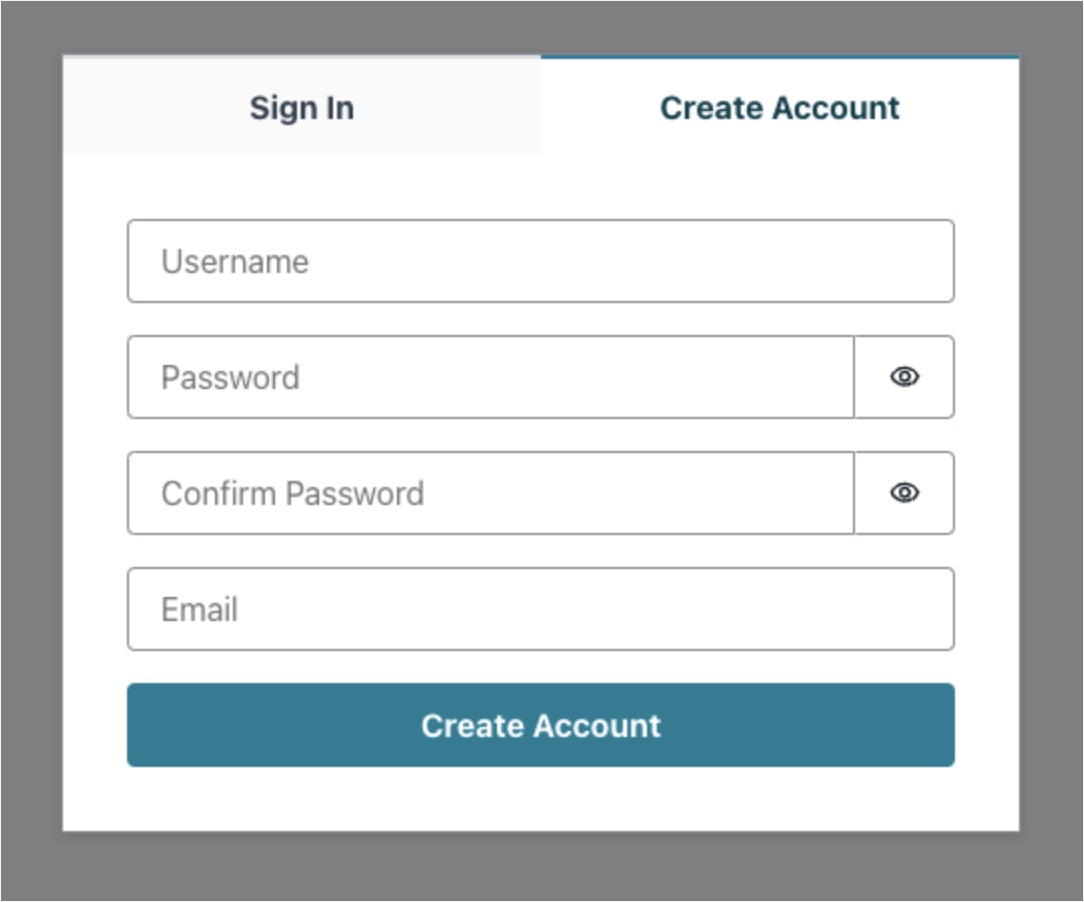
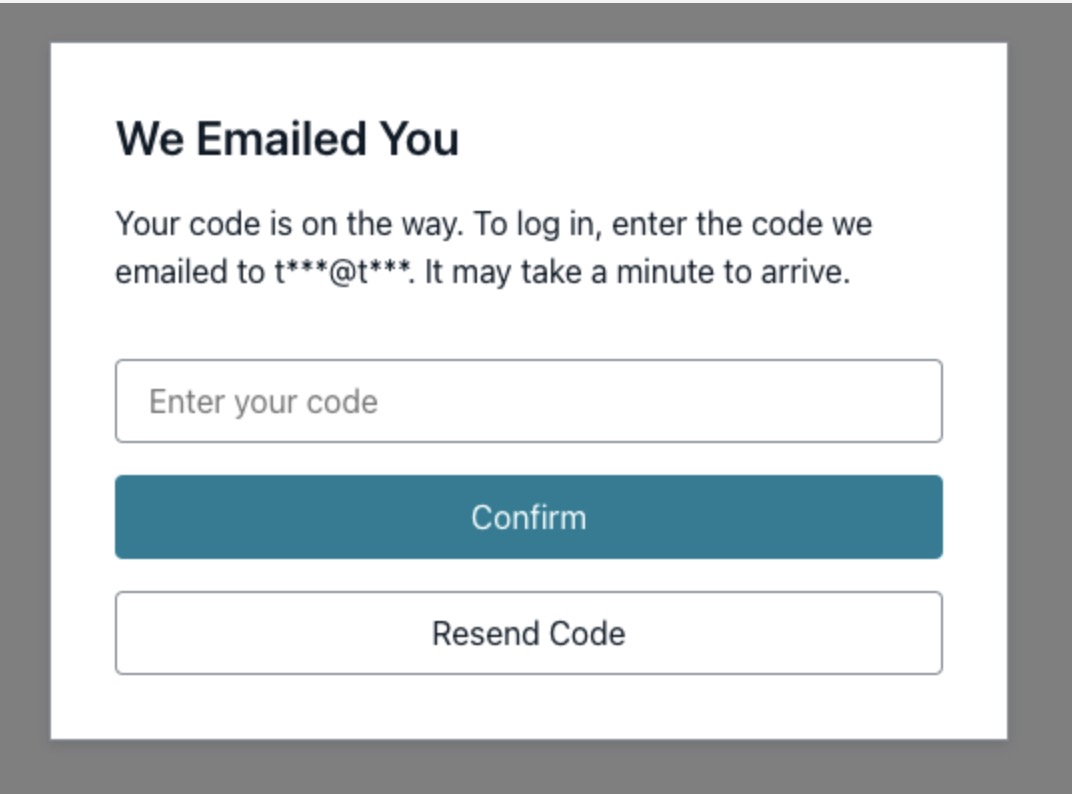
Here, you can try signing up, which will send a verification code to your email. Use the verification code to log in to the app. When signed in, you should see a Sign Out button, which signs you out and restarts the authentication flow.
Setup Ci/CD of the frontend and backend
Next, we need to configure the Amplify build process to add the backend as part of the continuous deployment workflow. From your terminal window run:
This will open the Amplify console. From the navigation pane, choose App settings > Build settings and modify it to add the backend section (lines 2–7 in the code below) to your amplify.yml. After making the edits, choose Save.
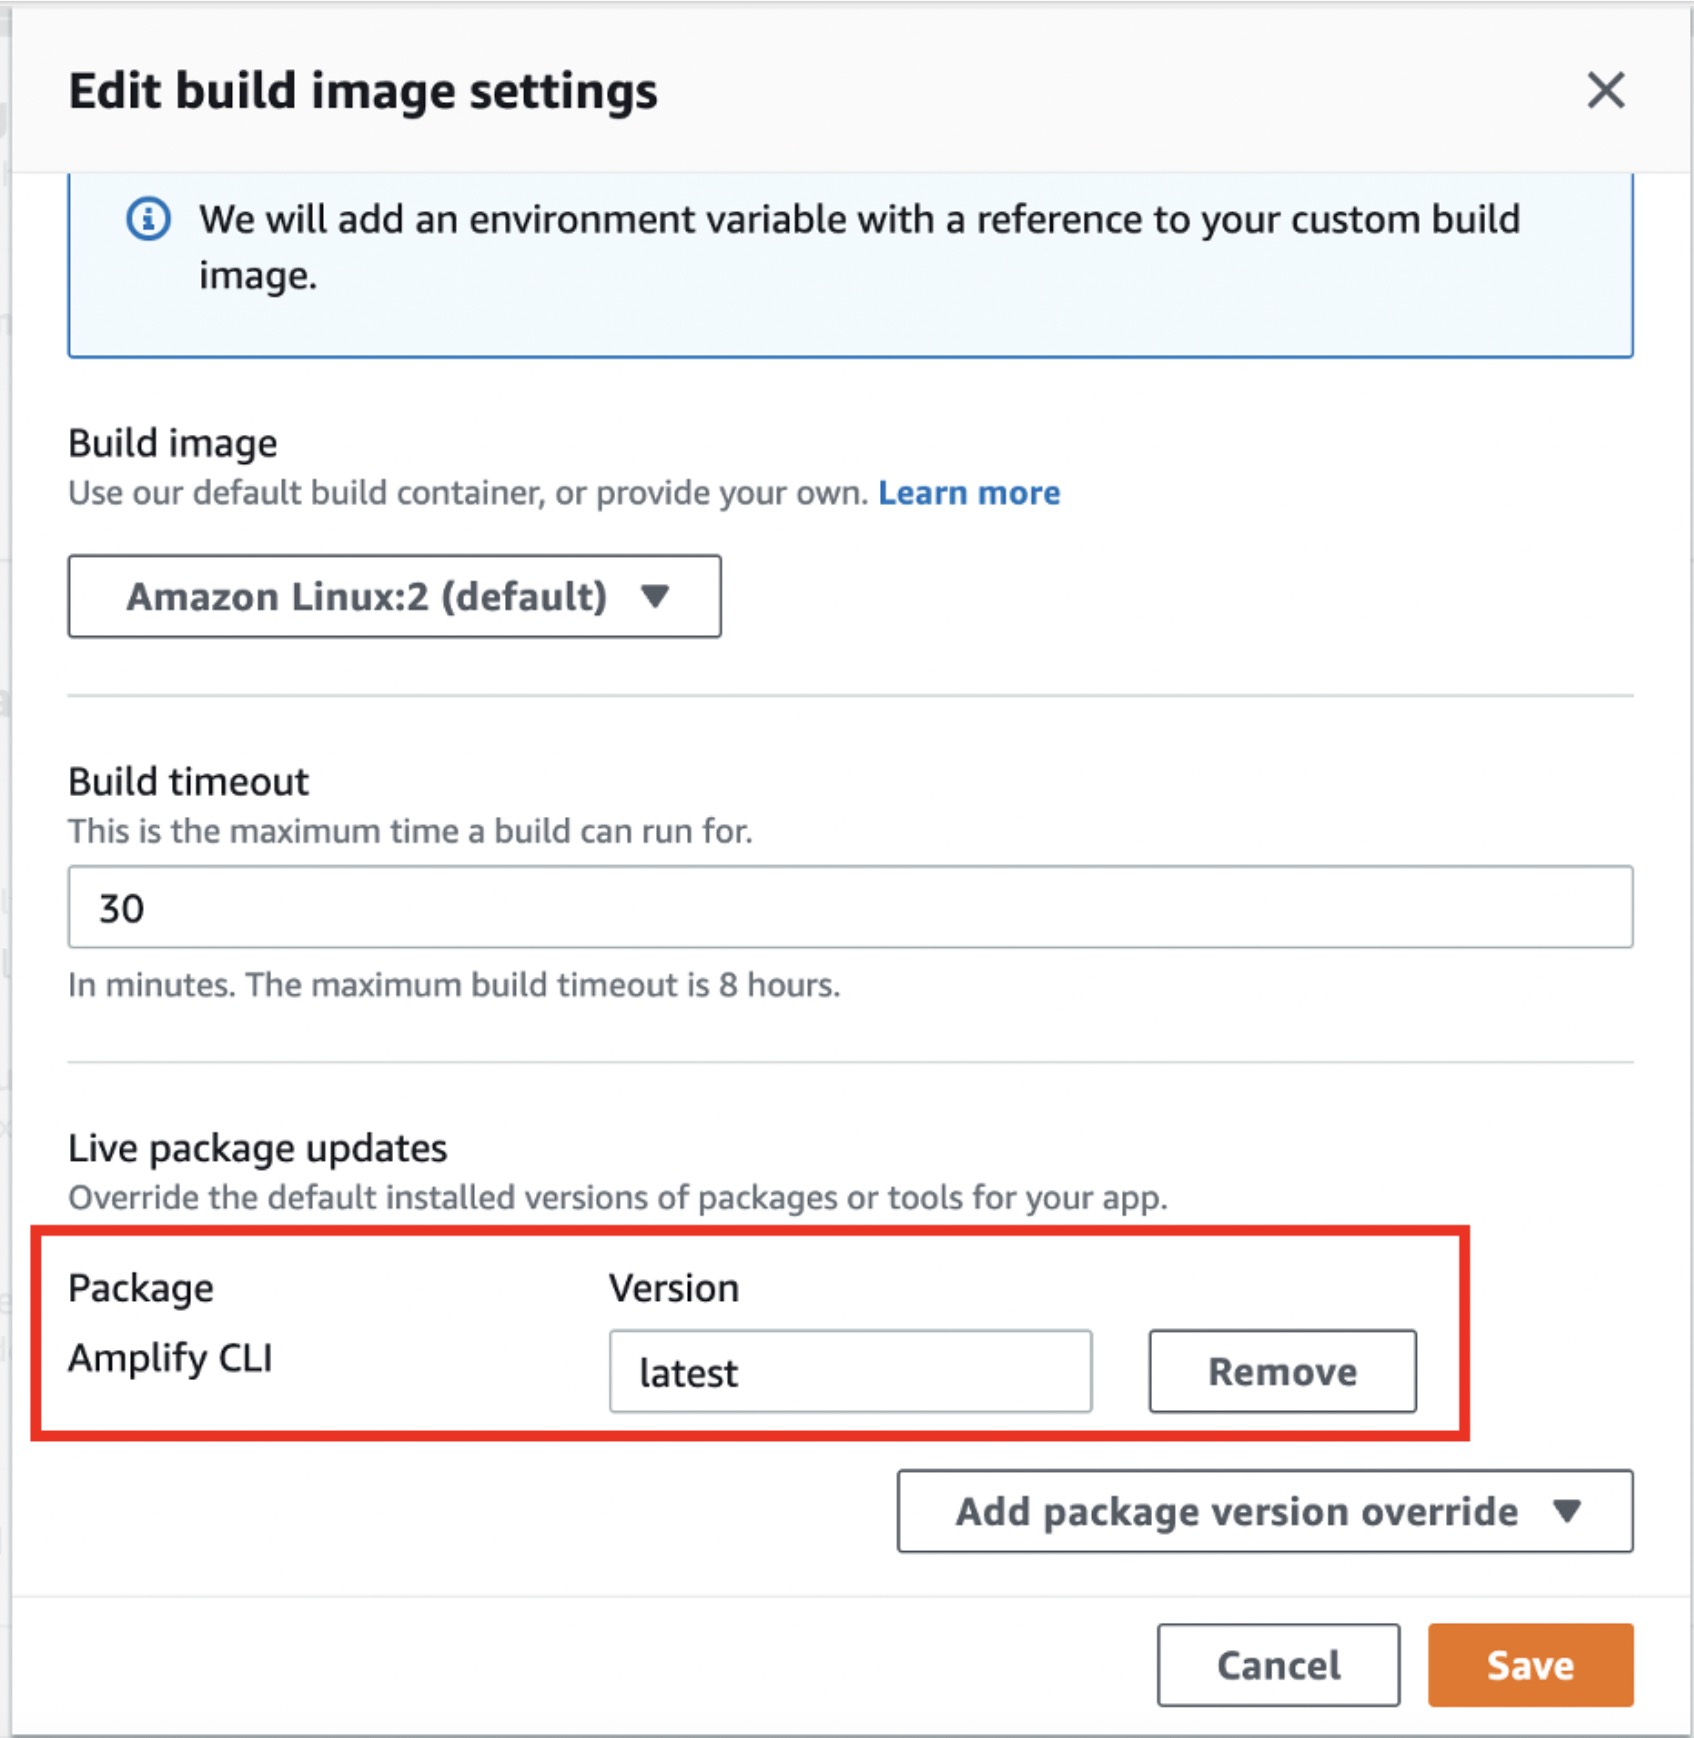
Scroll down to Build image settings and choose Edit. Select the Add package version override dropdown and select Amplify CLI. It should default to the latest version, as shown in the image.
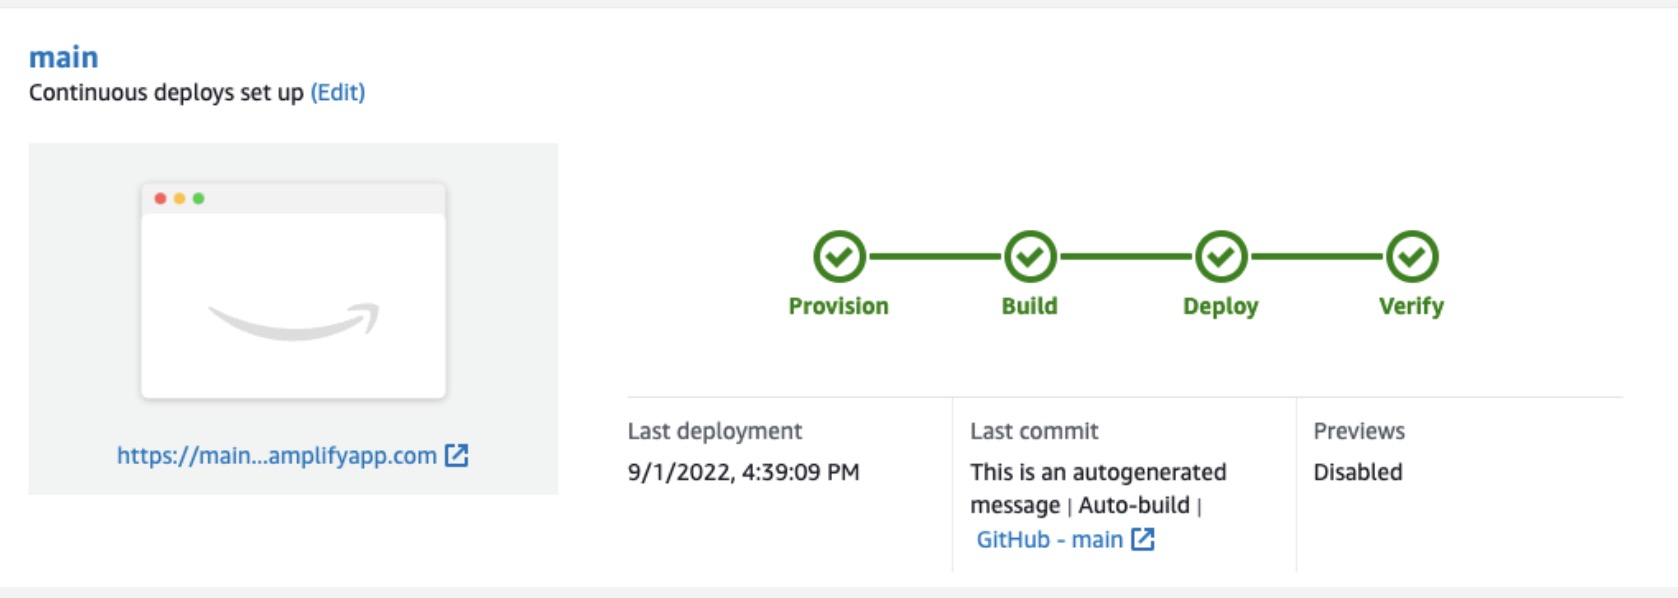
Next, update your frontend branch to point to the backend environment you just created. Under the branch name, choose * Edit*, and then point your main branch to the staging backend you just created. Choose Save.
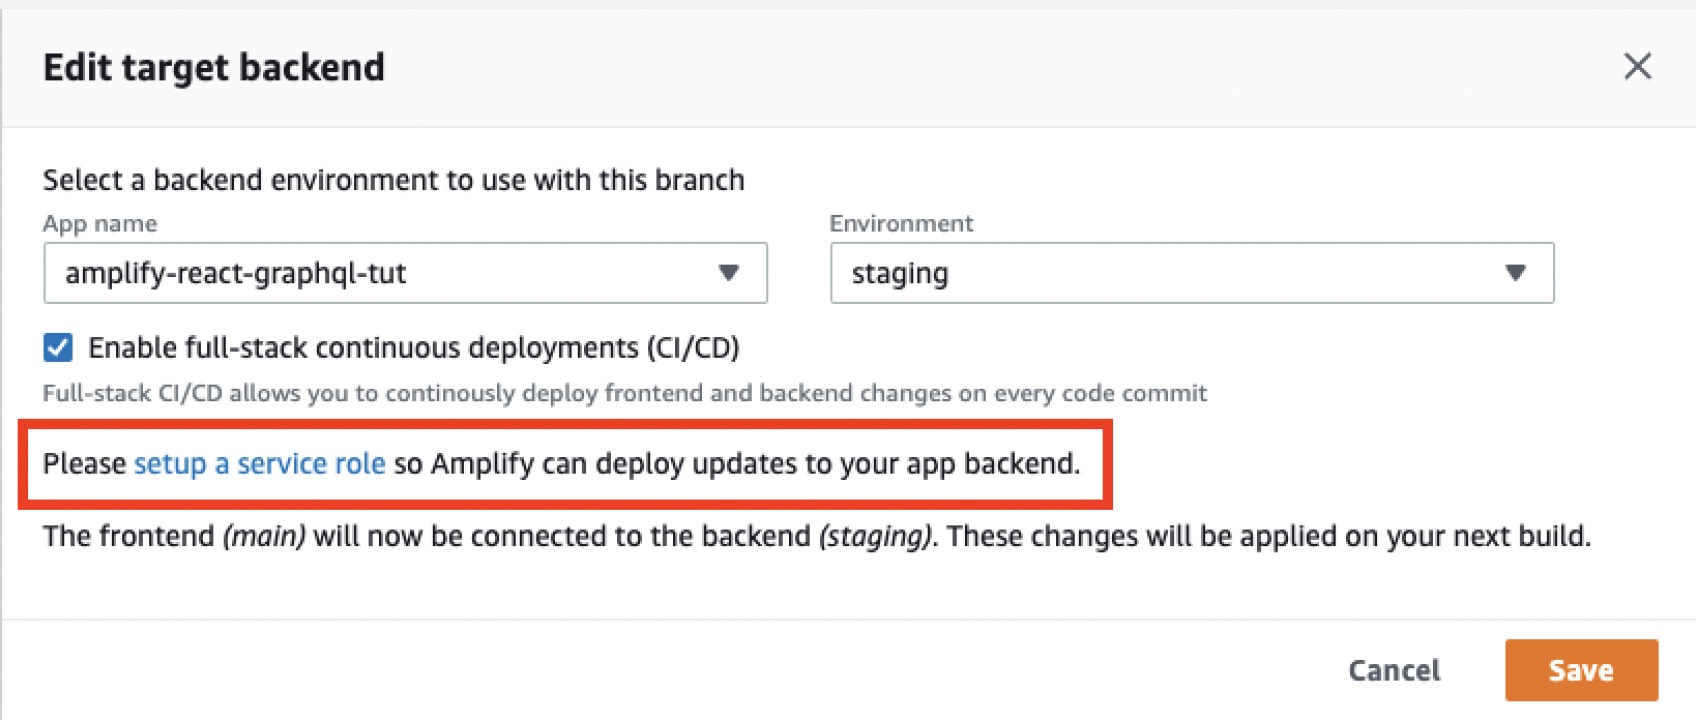
If you see the message Please set up a service role..., follow the instructions provided before continuing to set up and attach a service role to your app.
Deploy the changes to the live environment
Now return to your local terminal window and deploy the changes to GitHub to begin a new build in the Amplify console:
Conclusion
You have now added user authentication to your app with just a few lines of code. In the next module, we will add an API to your app.
Module 4: Add a GraphQL API and Database
Overview
Now that we have created and configured the app with authentication, let's add an API.
In this module, you will add an API to your app using the Amplify CLI and libraries. The API you will be creating is a GraphQL API that uses AWS AppSync (a managed GraphQL service) which is backed by Amazon DynamoDB (a NoSQL database). ( For an introduction to GraphQL, see the GraphQL website.)
The app we will be building will be a Notes app that will allow users to create, delete, and list notes. This example will give you a good idea of how to build many popular types of CRUD+L (create, read, update, delete, and list) applications.
What you will accomplish
In this module, you will:
Create and deploy a GraphQL API
Write frontend code to interact with the API
Key concepts
API – Provides a programming interface that allows communication and interactions between multiple software intermediaries.
GraphQL – A query language and server-side API implementation based on a typed representation of your application. This API representation is declared using a schema based on the GraphQL type system.
Implementation
Create a GraphQL API and database
a. Add a GraphQL API to your app by running the following command from the root of your app directory:
b. Open the GraphQL schema in your text editor: /amplify/backend/api/<api_name>/schema.graphql.
Update the file with the following schema:
c. Save the file.
Deploy the API
Now that the API has been configured locally, it is time to deploy it. To do so, run the Amplify push command:
This will do three things:
Create the AWS AppSync API
Create a DynamoDB table
Create the local GraphQL operations in a folder located at src/graphql that you can use to query the API
To view the GraphQL API in your account at any time, run the following command and then select GraphQL API in the left navigation pane:
To view the Amplify app in your account at any time, run the following command:
Write front-end code to interact with the API
Now that the backend has been deployed, let's write some code to allow users to create, list, and delete notes.
Update src/App.js with the following code:
Our app has three main functions:
fetchNotes—This function uses the API class to send a query to the GraphQL API and retrieve a list of notes.
createNote—This function also uses the API class to send a mutation to the GraphQL API. The main difference is that in this function we are passing in the variables needed for a GraphQL mutation so that we can create a new note with the form data.
deleteNote - Like createNote, this function is sending a GraphQL mutation along with some variables, but instead of creating a note, we are deleting a note.
Run the app
To test out the app, run the start command:
Conclusion
You have now created a Notes app. Using AWS Amplify, you added a GraphQL API and configured create, read, and delete functionality in your app. In the next module, we will add a storage service to your app.
Module 5: Add Storage
Overview
Now that we have the notes app working, let's add the ability to associate an image with each note. In this module, you will use the Amplify CLI and libraries to create a storage service using Amazon S3. You will then update the GraphQL schema you created in the previous module to associate an image with each note. Finally, you will update the React app to enable image uploading, fetching, and rendering.
What you will accomplish
In this module, you will:
Create a storage service
Update a GraphQL schema
Update your React app
Key concepts
Storage service - Storing and querying for files, such as images and videos, is a common requirement for most applications. One option to do this is to Base64 encode the file and send as a string to save in the database. This comes with disadvantages, such as the encoded file being larger than the original binary, the operation being computationally expensive, and the added complexity around encoding and decoding properly. Another option is to have a storage service specifically built and optimized for file storage. Storage services like Amazon S3 exist to make this as easy, performant, and inexpensive as possible.
Implementation
Create storage service
To add image storage functionality, we'll use the Amplify storage category. You can keep the default selections for most of the options below, but be sure to select the create/update, read, and delete options individually by pressing the spacebar on each before pressing Enter to continue with the prompt.
Update the GraphQL schema
Next, open amplify/backend/api/notesapp/schema.graphql and update it with the following schema:
Make sure to save the file.
Deploy storage service and API updates
Now that the storage service has been configured locally, and we have updated the GraphQL schema, we can deploy the updates by running the Amplify push command:
Update the React app
Now that the backend has been updated, let's update the React app to add the functionality to upload and view images for a note. Open src/App.js and make the following changes.
a. First, add the Storage class and Image component to your Amplify imports:
b. Update the fetchNotes function to fetch an image if there is an image associated with a note:
c. Update the createNote function to add the image to the local image array if an image is associated with the note:
d. Update the deleteNote function to delete files from storage when notes are deleted:
e. Add an additional input to the form in the return block:
f. When mapping over the notes array, render an image if it exists:
g. Commit your changes and push to GitHub. Then wait for the build to complete to see your full app live!
Run the app
To test out the app, run the start command:
You should now be able to optionally upload an image for each note.
Deleting the resources
Removing individual services
To remove individual services, you can use the Amplify remove command:
Then run the Amplify push command:
Deleting the entire project
To delete the project and the associated resources, you can run the Amplify delete command:
Conclusion
You have deployed a web application using AWS Amplify! You have added authentication to your app allowing users to sign up, sign in, and manage their account. The app also has a scalable GraphQL API configured with an Amazon DynamoDB database, allowing users to create and delete notes. You have also added file storage using Amazon S3 so that users can upload images and view them in their app.